How Long to Heat Press Vinyl
When you’re heat pressing vinyl, it’s crucial to follow the recommended times to ensure your designs last. Standard vinyl needs 10-15 seconds at 305°F, while glitter requires 15-20 seconds at 320°F. If you’re using metallic vinyl, aim for 10-15 seconds at 300°F.
The fabric type matters too—cotton, polyester, and blends can affect pressing times. Always check the manufacturer’s guidelines and do a test run to avoid issues like peeling or fading. These guidelines will help you get started, but there’s more to discover for achieving flawless results.
Understanding Heat Press Vinyl Basics
To get started with heat press vinyl, you need to understand what it is and why timing is crucial. Heat press vinyl is a type of material used to transfer designs onto fabrics using heat and pressure. Proper timing ensures that your designs adhere correctly, preventing issues like peeling or fading.
Why Timing Matters
Timing’s crucial when working with heat press vinyl because it directly affects the adhesion and durability of your design. If you don’t get the timing right, your design might peel off or crack after just a few washes. Too little time, and the adhesive won’t fully activate, causing weak bonds. On the flip side, excessive time can lead to overheating, which might burn or discolor the vinyl or the fabric it’s applied to.
You need to pay attention to the manufacturer’s guidelines for each type of vinyl. These instructions offer the recommended time range to ensure the best results. Each vinyl type, whether it’s glitter, matte, or metallic, may require different pressing times. The fabric you’re working with also plays a role. Thicker materials might need a bit more time than thinner ones to ensure the heat penetrates properly.
It’s not just about setting a timer and walking away. Keep an eye on your project during the process. Environmental factors like room temperature or the condition of your heat press machine can influence the outcome. By understanding why timing matters, you’re on your way to achieving professional-quality designs that last.
What Is Heat Press Vinyl?
Heat press vinyl, often referred to as HTV, is a versatile type of material used to transfer designs onto various fabrics using heat and pressure. It’s the go-to choice for customizing t-shirts, bags, and even hats. Whether you’re crafting for fun or starting a business, understanding the basics of HTV is crucial.
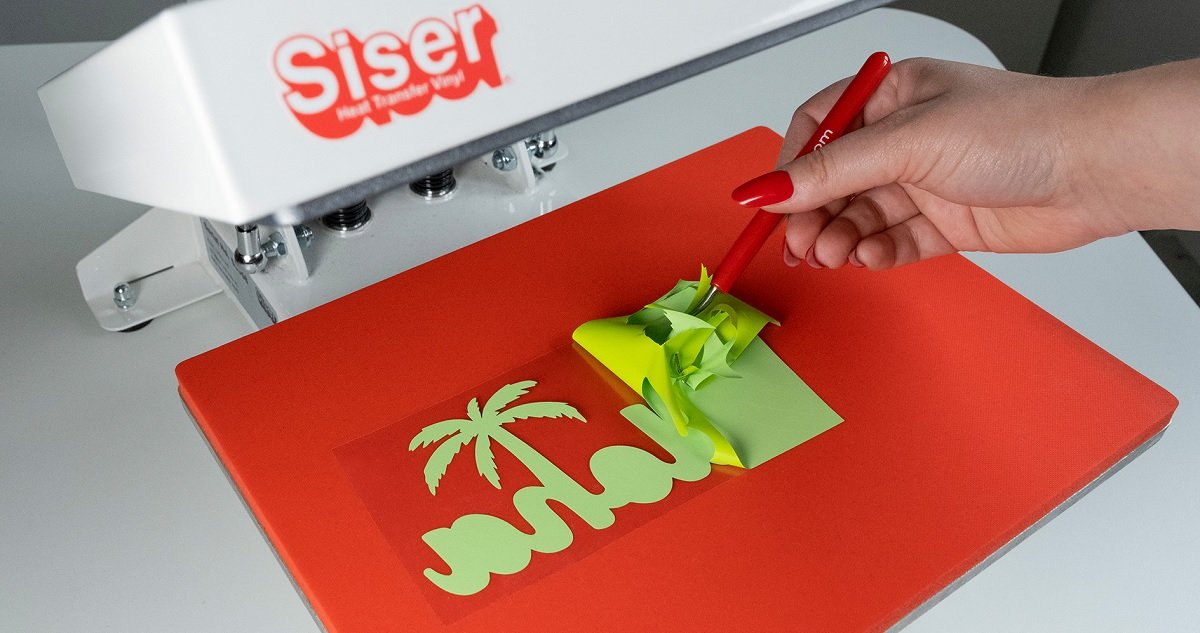
HTV comes in sheets or rolls and a variety of finishes like matte, glossy, glitter, or even holographic. You’ll first cut your design using a vinyl cutter, a device that precisely cuts the vinyl without damaging its backing. After cutting, you “weed” the excess vinyl, leaving only the design you want to transfer. This process can be intricate, depending on the complexity of your design.
Once you’ve prepared your design, it’s time to apply it using a heat press machine. The heat press provides the necessary temperature and pressure to ensure the vinyl adheres properly and stays durable through washes. It’s important to follow the manufacturer’s guidelines for each type of vinyl, as different materials may require varying temperatures and times. By mastering HTV application, you can create professional-looking products with ease.
Factors That Affect Heat Press Timing

When you’re working with heat press vinyl, timing is crucial and depends on a few key factors. The type of vinyl you’re using, the material of the garment, and the heat press settings all play a role in how long you should apply heat. By understanding these elements, you can ensure a perfect transfer every time.
Type of Vinyl
Different types of vinyl, such as standard, stretch, and glitter, each require specific heat press timing due to their unique properties. Standard vinyl, being the most commonly used, typically needs around 10-15 seconds of heat press time at a temperature of 305°F. It’s straightforward and reliable for most projects. However, when dealing with stretch vinyl, which is designed for materials that flex, you should adjust the timing slightly. Stretch vinyl usually requires 15-20 seconds at the same temperature to ensure it adheres properly without compromising its flexibility.
Glitter vinyl, on the other hand, is a bit more demanding due to its textured surface. It often requires a slightly longer time, about 15-20 seconds, at a temperature of 320°F to ensure the glitter particles bond effectively. Always remember to use a Teflon sheet or parchment paper to protect the surface and prevent any sticking.
Each vinyl type has its own characteristics, influencing how long you should heat press them. It’s crucial to follow the manufacturer’s instructions, as they provide the best guidelines for successful application. Keep these differences in mind, and you’ll achieve a perfect transfer every time.
Material of the Garment
While understanding vinyl types is important, the material of your garment plays a significant role in determining the correct heat press timing as well. Different fabrics react uniquely to heat, and knowing these differences can make or break your vinyl application. For instance, cotton requires a specific duration to ensure the vinyl adheres properly without damaging the fabric, whereas synthetic materials like polyester may need less time due to their lower heat tolerance.
Here are some garment materials and how they might affect your heat press timing:
- Cotton: A sturdy fabric that can handle higher temperatures and longer pressing times, making it ideal for beginners learning heat pressing.
- Polyester: Requires caution as it can scorch easily. Shorter pressing times and lower temperatures are usually necessary.
- Blends: Depending on the blend, you’ll need to adjust your timing. Cotton-polyester blends, for example, might need a balanced approach between the two.
- Spandex/Lycra: These stretchy materials can melt or warp under high heat, so a quick press at a lower temperature is key.
Heat Press Settings
Understanding the optimal heat press settings is crucial for ensuring vinyl adheres perfectly without damaging the garment. You’ll need to consider three main factors: temperature, pressure, and time. Each type of vinyl and fabric combination may require different settings, so it’s important to follow the manufacturer’s guidelines closely.
First, let’s talk about temperature. Most heat transfer vinyl (HTV) recommends a range between 305°F to 320°F. However, some specialty vinyl may need higher or lower temperatures. Always check the specific HTV instructions before you start pressing.
Next, pressure is another key factor. Too much pressure can cause the vinyl to warp or the fabric to scorch, while too little pressure might not allow the adhesive to bond properly. A medium pressure setting is often ideal, but again, refer to the vinyl’s guidelines.
Recommended Heat Press Times for Common Vinyl Types
When you’re working with heat press vinyl, knowing the right press times for different types is crucial. Whether you’re handling standard HTV, specialty vinyl, or layering multiple types, each has its own recommended settings to ensure a perfect finish. Let’s explore the ideal heat press times for these common vinyl types to help you achieve the best results.
Standard HTV
For optimal results with standard HTV, you’ll want to follow the recommended heat press times specific to each common vinyl type. Understanding these times ensures your designs adhere well and last longer. Let’s dive into some typical guidelines for standard HTV you might frequently use.
- Regular HTV: Most regular HTV types, like Siser EasyWeed, require around 10-15 seconds at 305°F. This is a good baseline for many standard projects.
- Glitter HTV: Glitter vinyl often needs a little more time and heat. Aim for 15-20 seconds at 320°F to ensure that the glitter stays sparkling and secure.
- Metallic HTV: For metallic vinyl, you’ll need slightly less time, typically around 10-15 seconds at 300°F. Be cautious, as too much heat can dull the metallic finish.
- Stretch HTV: Designed for stretchy fabrics, stretch HTV generally requires 15-20 seconds at 320°F. This helps the vinyl move with the fabric without cracking.
Specialty Vinyl
Beyond standard HTV, specialty vinyl offers unique finishes and effects, each requiring specific heat press settings to ensure optimal application and durability. Whether you’re working with glitter, holographic, or metallic vinyl, understanding the right press time is crucial. For glitter vinyl, you’ll typically need to press it at around 320°F for 15-20 seconds, using medium pressure. This ensures the adhesive bonds well without scorching the glitter particles.
Holographic vinyl, with its shimmering effect, usually requires a press time of 15-20 seconds at approximately 320°F. It’s essential to use firm pressure here to achieve a smooth finish. Metallic vinyl, known for its shiny, reflective surface, should be pressed at 305°F for 10-15 seconds, with medium pressure to avoid dulling the sheen.
Don’t forget about patterned vinyl, which often needs a slightly lower temperature of around 300°F for 15 seconds, using medium pressure. These specialty vinyl types can elevate your projects, but they need careful handling. Always refer to the manufacturer’s instructions, as they may vary slightly. Testing on a scrap piece first can save you from potential mishaps, ensuring your final product looks professional and polished.
Layering Vinyl
Layering vinyl can transform your designs, but mastering the right heat press times is essential for achieving a flawless finish. Each layer needs just the right temperature and duration to adhere correctly without causing damage. When working with multiple layers, always start with the base layer, using the shortest press time possible to avoid overheating. As you add layers, ensure each one is properly aligned and pressed for the appropriate time.
Here are some recommended heat press times for common vinyl types when layering:
- Standard HTV (Heat Transfer Vinyl): Press each layer for 5-7 seconds at 305°F. Once all layers are in place, do a final press for 10-15 seconds.
- Glitter Vinyl: Needs a bit more time. Press each layer for 10-12 seconds at 320°F, with a final press of 15 seconds.
- Metallic Vinyl: Press each layer for about 6-8 seconds at 300°F. Finish with a 10-second press.
- Stretch Vinyl: For each layer, press for 5 seconds at 320°F, and do a final press for 10 seconds.
How to Ensure Proper Heat Pressing
To ensure proper heat pressing, start by pre-pressing the garment to eliminate any moisture and wrinkles. Next, position the vinyl correctly to avoid alignment issues. Finally, always test on a small piece before the final press to ensure the desired results.
Pre-Pressing the Garment
Pre-pressing the garment is essential for eliminating moisture and wrinkles, ensuring the vinyl adheres perfectly. Before you even think about applying the vinyl, take a moment to pre-press your garment. This crucial step helps in creating a smooth and even surface, which is vital for a professional-looking finish. It also removes any moisture trapped in the fabric, which can affect the vinyl’s ability to bond properly.
Here’s how to pre-press your garment effectively:
- Heat Setting: Set your heat press to the recommended temperature for the fabric. This will vary, so check your heat press manual or fabric care label.
- Press Duration: Apply the heat press to the garment for just 3-5 seconds. This short burst is enough to eliminate wrinkles and moisture without damaging the fabric.
- Pressure: Use medium pressure during pre-pressing. Too much pressure can distort the fabric, while too little might not be effective.
- Cool Down: Allow the garment to cool briefly before applying the vinyl. This helps prevent any premature adherence issues.
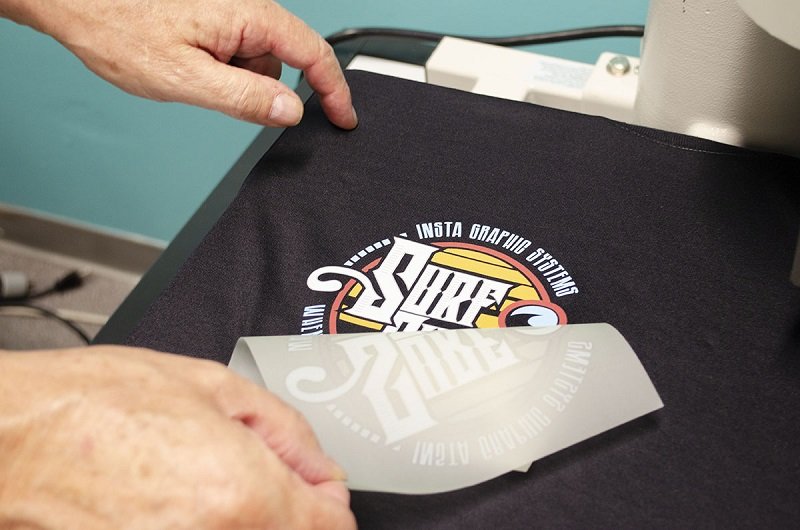
Positioning Vinyl Correctly
After pre-pressing, carefully align the vinyl on your garment to ensure it adheres smoothly and precisely during the heat pressing process. Start by laying the garment flat on the heat press, ensuring there are no wrinkles. Use a ruler or a measuring tape to position the vinyl correctly, centering it both horizontally and vertically. Make sure the design is straight and properly oriented. It’s helpful to use heat-resistant tape to secure the vinyl in place, preventing any shifting when you lower the press.
Here’s a quick guideline to help you position your vinyl accurately:
| Positioning Tip | Details |
|---|---|
| Measure Twice | Double-check all measurements |
| Center on Seams | Use side seams as reference points |
| Use Tape as Anchor | Prevents movement during pressing |
| Check with a Ruler | Ensures alignment and straightness |
| Visual Alignment | Step back for a full view |
Take your time to ensure everything’s aligned correctly. A little patience here can save you from redoing the process. Misalignment can lead to uneven pressing and unsatisfactory results. Remember, precision in placement is key to achieving a professional finish. Once you’re confident in the placement, you’re ready to proceed with the heat pressing process.
Testing Before Final Press
Before committing to the final press, it’s crucial to conduct a test press to verify that your settings are optimal for flawless application. This step lets you confirm your heat, pressure, and time settings are spot on, preventing mishaps on your final design. Here’s how you can ensure everything’s just right before moving forward.
First, choose a small piece of scrap fabric similar to your final material. Using the same vinyl, do a quick press to see how the vinyl adheres. This helps you assess whether the temperature or time needs adjustment. Pay attention to how the vinyl reacts; if it peels off easily or leaves residue, tweaks are necessary.
Consider these factors:
- Temperature Consistency: Ensure your heat press maintains a stable temperature throughout the process. Fluctuations can lead to inconsistent results.
- Pressure Calibration: Adjust the pressure to suit your material’s thickness. Too much pressure might damage your design, while too little won’t secure it properly.
- Time Accuracy: Verify that the set time is sufficient for vinyl adherence without risking overheating.
- Peel Method: Determine whether you should peel the carrier sheet hot or cold, based on your vinyl type.
Testing ensures your final press is perfect, saving you time and materials.
Troubleshooting Heat Press Vinyl Issues
When you’re facing issues with heat press vinyl, such as it not sticking properly or peeling off after washing, it can be frustrating. You’ll want to check the temperature and pressure settings to ensure they’re correct for your vinyl type. Also, watch out for burn marks or overheating, which can ruin your design and waste material.
Vinyl Doesn’t Stick
If your vinyl isn’t sticking, it’s crucial to check the temperature, pressure, and time settings on your heat press. These factors play a significant role in ensuring the vinyl adheres properly. First, make sure the temperature is set according to the vinyl manufacturer’s recommendations. If it’s too low, the adhesive won’t activate, and if it’s too high, you risk damaging the material.
Next, assess the pressure. Too little pressure can prevent the vinyl from bonding with the fabric, while too much might cause the vinyl to wrinkle or distort. Adjust the pressure knob until it feels just right for the type of material you’re working with. Timing is another essential element. Leaving the heat press on for too short or too long can result in poor adhesion.
Here are some troubleshooting tips to help you resolve the sticking issue:
- Check compatibility: Ensure your vinyl is suitable for the fabric you’re using.
- Clean the surface: Remove any dust or debris from the fabric before pressing.
- Pre-press the fabric: This step helps eliminate moisture and smooths out the surface.
- Use a pressing pillow: It can help even out pressure on uneven surfaces.
Vinyl Peels Off After Washing
One common issue with heat press vinyl is when it peels off after washing, often due to incorrect application or washing methods. It’s crucial to ensure that you’re using the right temperature, pressure, and pressing time tailored to the specific vinyl type. If the vinyl isn’t adhering correctly, try double-checking these settings. Additionally, improper washing practices can lead to premature peeling. Always turn garments inside out, use a gentle cycle, and avoid high heat settings in the dryer.
Here’s a quick guide to troubleshoot the peeling problem:
| Issue | Solution |
|---|---|
| Incorrect temperature | Adjust to the recommended heat settings for your vinyl |
| Insufficient pressure | Increase the pressure ensuring even contact |
| Incorrect washing method | Wash inside out, use cold water, and air dry |
Burn Marks or Overheating
While ensuring proper adhesion is important, it’s equally vital to prevent burn marks or overheating during the heat press process. If you’re not careful, too much heat can scorch your fabric or cause the vinyl to warp, compromising the quality of your project. To avoid these issues, it’s crucial to understand the right balance between temperature, time, and pressure.
Here are some practical tips to help you prevent burn marks and overheating:
- Use the Right Temperature: Always check the vinyl’s recommended temperature settings. Different types of vinyl and fabric require different heat levels.
- Monitor the Time: Avoid pressing for too long. Set a timer to ensure you don’t exceed the recommended pressing duration.
- Apply Correct Pressure: Too much pressure can lead to overheating. Adjust the pressure settings on your heat press as needed.
- Use a Teflon Sheet: Placing a Teflon sheet between the heat press and your design can help distribute heat more evenly and protect the fabric.
Tips for Perfect Heat Press Results
Achieving flawless heat press results requires attention to detail and a few expert tips to guide your process. First, always preheat your fabric. This step removes any moisture and wrinkles, ensuring the vinyl adheres smoothly. Use a lint roller to pick up any dust or fibers that could interfere with the adhesive.
Next, make sure you’re using the correct pressure. Firm pressure is often required, but it’s important to check your specific vinyl’s instructions. Too much pressure can distort the design, while too little might prevent proper adhesion. Adjust your heat press machine accordingly.
Temperature and time settings are crucial. Refer to your vinyl’s guidelines to find the ideal combination. Typically, temperatures range from 305°F to 320°F, with times spanning 10 to 15 seconds. However, always verify these details as they can vary.
Frequently Asked Questions
Can I Use a Regular Iron Instead of a Heat Press for Vinyl?
Yes, you can use a regular iron instead of a heat press for vinyl, but it may require some extra effort. You’ll need to ensure even pressure and consistent temperature, which might be tricky with an iron. Make sure to use a hard surface and apply firm pressure.
Set the iron to the cotton setting, and keep it moving to avoid scorching. It’s manageable, but not as precise as a heat press.
What Is the Best Temperature Range for Heat Pressing Vinyl?
When deciding on the best temperature for heat pressing vinyl, you’ll want to aim for a range between 305°F to 320°F. This ensures the adhesive activates properly without damaging the fabric. Make sure you’ve got even pressure and time it right, usually around 10-15 seconds.
If you’re using a heat press, it helps achieve consistent results. Just keep an eye on your specific vinyl’s instructions for any variations.
Does the Type of Fabric Affect Heat Press Time for Vinyl?
Yes, the type of fabric definitely affects how long you should heat press vinyl. Different fabrics have varying heat and pressure tolerances, so you’ll need to adjust accordingly. For instance, cotton might require a different time than polyester or spandex.
It’s important to check the vinyl manufacturer’s guidelines and do a test press on a small fabric piece. This way, you avoid scorching or damaging the material while ensuring the vinyl adheres properly.
How Do I Know if My Heat Press Is Calibrated Correctly?
To know if your heat press is calibrated correctly, start by checking the temperature with a heat gun or infrared thermometer to ensure it matches your machine’s display. You should also test the pressure by attempting a sample press on scrap material; it should provide even adhesion.
If you’re noticing uneven results or vinyl not sticking properly, recalibrate the machine according to the manufacturer’s instructions to achieve optimal performance.
Can Heat Pressing Damage the Vinyl or the Fabric?
Yes, heat pressing can damage the vinyl or fabric if you’re not careful. If you use too much heat or press for too long, you might scorch the fabric or cause the vinyl to melt or wrinkle. Always check the manufacturer’s recommendations for temperature and time.
It’s crucial to ensure your heat press is calibrated correctly. Test on a scrap piece first to avoid ruining your project.
Conclusion
In conclusion, mastering heat press vinyl doesn’t have to be daunting. By understanding the basics, considering the factors that affect timing, and following recommended times for different vinyl types, you’ll achieve great results.
Always ensure proper heat pressing techniques and troubleshoot any issues that arise. With these tips in mind, you’re well-equipped to create perfect designs every time. Remember, practice makes perfect, so don’t hesitate to experiment and refine your skills along the way.