
How to Make Heat Press Transfers? (Detailed Guide!)
Heat press transfers are an excellent way to create custom designs on clothing, accessories, and other fabric-based items. Whether you’re a business owner, hobbyist, or crafter, learning how to make heat press transfers allows you to personalize garments with designs, logos, or even photographs.
The process involves printing a design onto a transfer medium and using a heat press machine to apply the design to a substrate (usually fabric). With the right materials, equipment, and techniques, you can achieve professional-quality results.
In this guide, we’ll take you step by step through the process of making heat press transfers, from choosing the right materials to executing the final press.
How to Make Heat Press Transfers: Step by Step
Materials and Equipment You’ll Need
Before you start creating your own heat press transfers, gather the following essential materials and equipment:
- Heat Press Machine: A heat press machine is the main tool used to transfer your design onto the fabric. Choose a machine that suits the type of work you plan to do, whether it’s a clamshell, swing-away, or multi-function heat press.
- Transfer Paper: There are different types of transfer paper, depending on the kind of design and the substrate you are working with. Common types include:
- Inkjet Transfer Paper: For use with inkjet printers.
- Laser Transfer Paper: For use with laser printers.
- Sublimation Paper: Used for sublimation printing on polyester fabrics and coated items.
- Printer: You will need a printer to print your design onto the transfer paper. Most people use inkjet or laser printers, depending on the type of transfer paper they’re using.
- Design Software: Design software like Adobe Illustrator, CorelDRAW, or free alternatives like GIMP and Canva can be used to create or edit your designs.
- Substrate (Fabric or Material): The material or fabric you’ll transfer your design onto. Common options include cotton, polyester, blends, and other heat-resistant fabrics.
- Heat Transfer Vinyl (Optional): If you’re working with vinyl designs, you’ll need heat transfer vinyl (HTV) in addition to or instead of transfer paper.
- Cutting Machine (Optional): For vinyl designs, a cutting machine like a Cricut or Silhouette is required to cut the vinyl into the desired shape.
- Teflon Sheet or Parchment Paper: Used to protect your fabric and press from excess ink or adhesive during the transfer process.
Step 1: Create or Choose Your Design
The first step in making a heat press transfer is to create or select a design. You can either design something from scratch using design software, or download pre-made designs from online marketplaces.
- Choose a Design Type: You can create various types of designs, such as logos, text-based designs, images, or complex artwork. Keep in mind the color scheme and how the design will look on your substrate.
- Resolution: Ensure your design is high resolution (at least 300 dpi) for clarity when printed. Low-resolution images can appear pixelated and unprofessional when transferred.
- Consider the Fabric Color: Light fabrics are more forgiving, while dark fabrics may require special handling, such as using opaque transfer paper or layering techniques.
Step 2: Print the Design on Transfer Paper
Once your design is ready, it’s time to print it onto the appropriate transfer paper. Follow these steps:
- Mirror the Design (for Text or Detailed Graphics): If your design contains text or needs to be oriented in a specific way, it’s important to mirror (flip horizontally) the design before printing. This ensures that the design will appear correctly when pressed onto the fabric.
- Choose the Right Transfer Paper: Ensure that you are using transfer paper that matches both your printer type (inkjet or laser) and the color of the fabric (light or dark). For example, transfer paper for light fabrics is usually transparent, while transfer paper for dark fabrics is opaque.
- Print on the Correct Side: Transfer papers have a printable side and a backing. Make sure you’re printing on the right side of the paper (usually marked or slightly textured) to avoid wasting materials.
- Allow Ink to Dry: After printing, let the ink dry completely before handling the transfer paper. This will prevent smudging and ensure a cleaner transfer.
Step 3: Prepare the Substrate
Before applying the heat press transfer, it’s important to prepare the substrate (fabric or material) to ensure a smooth and successful transfer.
- Pre-Press the Fabric: Preheat your heat press machine to the recommended temperature for your fabric and transfer paper. Place the fabric on the heat press and give it a quick pre-press (around 5-10 seconds) to remove any moisture and wrinkles. This helps the transfer adhere better to the fabric.
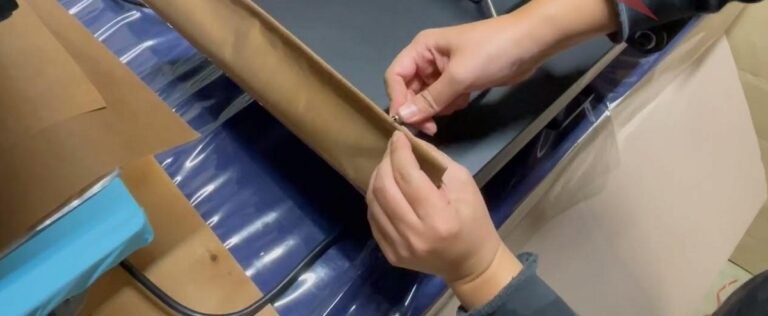
- Center the Design: Position the transfer paper (design side down) on the fabric. Use a ruler or other alignment tool to ensure the design is centered and straight. A misaligned design can ruin the final product, so take your time here.
Step 4: Apply the Heat Press
With the design and substrate ready, it’s time to transfer the design using your heat press machine.
- Set the Temperature and Time: The exact temperature and time settings depend on the type of transfer paper, ink, and fabric you’re using. Generally, transfer papers work at temperatures between 350°F and 400°F, with pressing times ranging from 10 to 30 seconds. Always refer to the manufacturer’s instructions for precise settings.
- Apply Even Pressure: Close the heat press and apply firm, even pressure. Be careful not to apply too much or too little pressure, as this can affect the quality of the transfer. Most heat press machines have adjustable pressure settings—set this according to the substrate thickness.
- Use a Teflon or Parchment Paper: Place a Teflon sheet or parchment paper between the transfer paper and the top platen of the heat press to protect your fabric and platen from ink bleed or excess adhesive.
- Press and Wait: Once the press is engaged, let the machine apply heat and pressure for the required time. Avoid opening the press prematurely, as this can cause the transfer to fail.
Step 5: Peel and Cool
After the pressing is complete, it’s time to peel away the transfer paper. The peeling method (hot peel or cold peel) depends on the type of transfer paper you used:
- Hot Peel: Some transfer papers require you to peel off the backing immediately after pressing while the transfer is still hot. This is often used with inkjet transfer papers.
- Cold Peel: Other papers may require the transfer to cool down before peeling. This method is common with heat transfer vinyl (HTV) or some opaque transfer papers.
Refer to the instructions on your transfer paper packaging to know which method to use. Peel the paper carefully to avoid lifting any part of the design.
Step 6: Post-Pressing Care
Once the transfer is complete, let the fabric cool down before handling it. Additionally, to ensure the longevity of the transfer, consider the following care tips:
- Wash and Dry Instructions: If you’re producing garments, it’s important to communicate proper washing instructions to maintain the transfer’s quality. Most transfers should be washed inside-out with cold water and mild detergent. Avoid high heat when drying.
- Cure the Design (Optional): For extra durability, you can press the fabric one more time (using a Teflon sheet) after peeling the transfer paper. This helps to “cure” the design, making it more resistant to washing and wear.
3 Most Common Types of Heat Press Transfers
Depending on the material and design method, here are some common types of heat press transfers:
- Sublimation Transfers: Sublimation printing uses special inks that convert to gas under heat and pressure, bonding with polyester fabrics or coated surfaces. It’s ideal for vibrant, permanent designs on polyester clothing, mugs, and other items.
- Heat Transfer Vinyl (HTV): HTV involves cutting designs from colored vinyl sheets, which are then heat pressed onto fabric. It’s popular for creating custom t-shirts, sports uniforms, and personalized items.
- Inkjet or Laser Transfers: These involve printing a design onto transfer paper using either an inkjet or laser printer. The transfer paper is then heat pressed onto the fabric, making it an affordable option for custom apparel.
Conclusion
Creating heat press transfers is a rewarding process that allows you to customize clothing, accessories, and various fabrics with unique designs. By following the steps outlined in this guide—choosing your design, printing on transfer paper, preparing your fabric, applying heat with a press, and peeling the transfer paper—you can create professional-quality products at home or for your business.
Whether you’re using sublimation printing, heat transfer vinyl, or inkjet transfers, understanding the right techniques and materials is crucial for success. With practice and attention to detail, you’ll be able to make vibrant, durable, and high-quality heat press transfers.


Güzel yazı.
diyarbakır escort bayan bakarken gördüm.
İşe yaradı.
my website – Vip escort
Fena değil.
diyarbakır escort bayan bakarken gördüm.
İşe yaradı.
Fena değil.
diyarbakır escort ararken buraya denk geldim.
Gerekli bilgiyi aldım.
Sağ olun.
Fena değil.
diyarbakır escort bakarken gördüm.
Faydalı.
Check out my blog post; özel buluşma
Konu iyi anlatılmış.
diyarbakır escort ararken buraya denk geldim.
İşime yaradı.
Sağ olun.
Take a look at my blog: diyarbakır eskort Bayan
Fortune Dragon me carregou hoje.
A galera mais antiga respeita mais os veteranos calados que o streamer mais barulhento.
O cara que parou de chasing em março perdeu R$120 fazendo chasing no Sweet Bonanza, postou o comprovante, assumiu. Respeito.
Dois bônus seguidos no Three Monkeys, ambos uns 30x. Estranho.
I would like to learn how to design my own images to transfer on t-shirts. Your website is the first one that I have come across that seems to know what I am talking about. Do you have a guide or something that I could purchase to get me started. I do not want to print other people’s heat transfers, I want to make my own. I thank you for the information on your website to show me what I would need to get me started.
withdraw usdt to cash https://exchange-usdt-cash.com
Современный строительный https://dki.org.ua портал с обзорами технологий, материалов и инструментов. Читайте статьи о строительстве частных домов, ремонте помещений, инженерных коммуникациях и эффективных решениях для комфортного проживания.
Портал о строительстве https://fmsu.org.ua и ремонте с подробными руководствами, обзорами оборудования и строительных материалов. Узнавайте о новых технологиях, современных решениях и практическом опыте специалистов отрасли.
Ремонт и строительство https://intellectronics.com.ua информационный портал о современных технологиях, строительных материалах и практических решениях для дома. Полезные статьи, обзоры, инструкции и советы специалистов для успешной реализации проектов любой сложности.
Строительство и ремонт https://keravin.com.ua для дома, квартиры и дачи. Полезные статьи о проектировании, отделке, инженерных коммуникациях, благоустройстве территории и современных решениях для комфортной жизни.
Информационный сайт https://kero.com.ua о ремонте и строительстве с рекомендациями по выбору материалов, организации работ и применению современных технологий. Полезный ресурс для частных застройщиков и профессионалов отрасли.
Портал о строительстве https://purr.org.ua домов, ремонте квартир и благоустройстве участков. Читайте статьи о строительных технологиях, дизайне интерьеров, выборе подрядчиков и современных тенденциях отрасли.
Полезный строительный https://quickstudio.com.ua блог с идеями для ремонта, обустройства дома и повышения комфорта. Читайте обзоры материалов, советы специалистов и вдохновляйтесь новыми проектами.
Ремонт и строительство https://sushico.com.ua от профессионалов: обзоры технологий, рекомендации по выбору материалов, советы по организации работ и полезная информация для владельцев домов, квартир и коммерческой недвижимости.
In 2026 is casino online ideal nog altijd de populairste keuze onder Nederlandse gokkers — snel, veilig en nu verrijkt met het Wero-systeem. Kwalitatieve iDEAL casino’s staan bekend om directe uitbetalingen, een gevarieerd spelaanbod en volledige naleving van de KSA-vereisten.
Do you like excitement? $10 payid casino sites choosing the right casino comes down to more than just game selection. For players in Australia, seamless AUD bank transfers via PayID have become a deciding factor — offering a level of speed and security that credit cards and e-wallets simply can’t match.
Hrajete v kasinu? nejlepsi zahranicni casino lakaji ceske hrace cim dal vice — a neni se cemu divit. Bohatsi herni knihovna, stedrejsi bonusy a moznost platit kryptomenami delaji z techto platforem zajimavou alternativu k tuzemskym kasinum. Nize najdete proverene zahranicni weby dostupne ceskym hracum v roce 2026.
Najlepsze kasyno online wyplacalne kasyna online szybka wyplata wygranych to dla polskich graczy jeden z najwazniejszych kryteriow wyboru kasyna. Wyplacalne kasyna internetowe wyrozniaja sie nie tylko sprawnymi transakcjami, ale tez rzetelnoscia i stabilnym dzialaniem — bez zbednych opoznien i ukrytych warunkow.
the very best instant payout casino australian players know the frustration of slow withdrawals — and the best casinos have listened. Instant withdrawal platforms now process payouts in real time, sending your AUD winnings straight to your bank account or digital wallet without unnecessary delays or paperwork.
Nie kazdy wie, ze zagraniczne kasyna online moga oferowac znacznie wiecej niz rodzime platformy. Od wiekszych bonusow powitalnych po blyskawiczne wyplaty i gry niedostepne w Polsce — wybor jest ogromny. Zebralismy dla ciebie najlepsze i najbezpieczniejsze opcje dostepne dla polskich graczy.
Chcete hrat bez zbytecne byrokracie? casino bez overeni uctu umoznuji ceskym hracum okamzity pristup ke hram bez nutnosti dokladat osobni doklady. Rychla registrace, anonymni hrani a rychle vyplaty — to jsou hlavni duvody, proc si tato casina ziskavaji stale vice priznivcu.
Разбираем, почему не работает 1win и какие причины могут вызывать проблемы с доступом. Возможные технические сбои, обновления сервиса, ошибки подключения, ограничения провайдера и способы проверки работоспособности сайта.
Что делать, если 1win не выводит деньги? Разбираем возможные причины задержек выплат, особенности проверки аккаунта, статусы заявок и распространенные проблемы, с которыми могут столкнуться пользователи при выводе средств.
Профессиональная верификация гугл мой бизнес для компаний, которые хотят подтвердить профиль организации и повысить доверие клиентов. Корректно оформленная карточка помогает улучшить видимость бизнеса в Google Поиске и на Картах, привлекать новых клиентов и управлять информацией о компании.
Ваш провідник у житті Луцька https://43000.com.ua новини міста, культурні події, афіша заходів, бізнес, освіта та корисні поради для мешканців і гостей. Уся важлива інформація про Луцьк в одному місці.
Современный портал https://rus3edin.org.ua о строительстве и ремонте с материалами по проектированию, отделке, утеплению, монтажу инженерных систем и благоустройству территории. Все необходимое для успешной реализации строительных проектов.
Строительные идеи https://texha.com.ua ремонтные решения и полезные советы для дома. Узнавайте о современных технологиях, надежных материалах, инженерных системах и способах сделать жилье комфортным, функциональным и долговечным.
Портал об автомобилях https://diesel.kyiv.ua и современных транспортных технологиях. Статьи о новых моделях, сравнительные обзоры, рекомендации по обслуживанию и полезная информация для каждого автомобилиста.
kotor bay yacht charter yacht rental in budva
Ваш гид в мире ремонта https://tfsm.com.ua и строительства. Пошаговые инструкции, обзоры строительных материалов, советы мастеров и практические решения для ремонта квартир, строительства домов и благоустройства участков.
Мир дизайна https://vineyardartdecor.com и интерьера с вдохновляющими проектами, экспертными рекомендациями и полезными статьями. Узнайте, как создать красивое, практичное и современное пространство для жизни и работы.
От фундамента до декора https://vodocar.com.ua все о строительстве и ремонте в одном месте. Актуальные статьи, экспертные рекомендации, обзоры новинок рынка и проверенные решения для частных и коммерческих объектов.
Современный портал https://zlochinec.kyiv.ua для мужчин о здоровье, саморазвитии, бизнесе и увлечениях. Практические рекомендации, актуальные новости и вдохновляющие истории для тех, кто стремится к новым достижениям.
Мир женских интересов https://amideya.com.ua в одном информационном ресурсе. Читайте статьи о моде, здоровье, карьере, семье и путешествиях, находите полезные рекомендации и вдохновение на каждый день.
Строительный журнал https://buildingtips.kyiv.ua для тех, кто строит, ремонтирует и обустраивает недвижимость. Полезные публикации о технологиях строительства, дизайне интерьеров, выборе подрядчиков и современных материалах.
Мир автомобилей https://auto-club.pl.ua в одном месте: автоновости, обзоры, рейтинги, советы по ремонту и обслуживанию. Следите за новинками автопрома, узнавайте о характеристиках моделей и тенденциях автомобильного рынка.
Все о современном https://dcsms.uzhgorod.ua доме: строительство, ремонт, интерьер и благоустройство. Экспертные статьи, обзоры материалов и полезные рекомендации для создания комфортного пространства для жизни.
Строительство без ошибок https://donbass.org.ua начинается здесь. Узнавайте о новых технологиях, популярных строительных материалах, особенностях ремонта и эффективных решениях для жилой и коммерческой недвижимости.
Практический портал https://dsmu.com.ua о ремонте, строительстве и обустройстве жилья. Реальные советы, инструкции и обзоры помогут сократить расходы, повысить качество работ и добиться отличного результата.
Pizza Venezia — Итальянская пицца в Москве https://pizza-venezia.ru быстрая доставка горячей пиццы, пасты, закусок и десертов. Свежие ингредиенты и классические рецепты.
На нашем сайте доступны смотреть сериалы онлайн разных жанров и направлений – от последних киноновинок до культовых шедевров, к которым хочется возвращаться. Мы объединили в единой библиотеке большой каталог видеоконтента, чтобы каждый пользователь мог легко подобрать интересный контент для отдыха. Основная часть каталога доступна в отличном качестве HD, а количество рекламы сведено к минимуму, чтобы ничто не отвлекало от просмотра. Коллекция непрерывно обновляется, расширяя выбор актуального контента, о которых часто упоминают поклонники кино.
Проблемы со здоровьем? телефон медицинского центра прием врачей различных специальностей, точная диагностика, профилактические обследования и индивидуальный подход к каждому пациенту. Забота о здоровье с использованием современных методов лечения.
лагерь на весенние каникулы https://letniy-lager.ru
The CS2 Pro https://counter-strike.ch portal features the latest Counter-Strike 2 news, live match results, tournament schedules, and analysis. Learn about professional scene events, team rankings, and the top stories from the world of CS2.
With Valorant Tracker https://valorant-fa.com/ you can learn about professional player settings, find the best aim, track ranks, and analyze match statistics. A useful tool for improving your skills and progressing more effectively in VALORANT.
Valorant Tracker https://www.valorant-th.com is your companion in the world of VALORANT. Professional player settings, the best crosshair codes, current ranks, match statistics, and detailed analytics will help you improve your gaming skills and climb the ranking ladder faster.
Everything about VALORANT http://www.valorant-bn.com/ in one place: professional settings, crosshair codes, ranks, player stats, and match analytics. Valorant Tracker helps you track your achievements, learn from the best players, and improve your gameplay.
GTA 6 release date https://gta6-online.hu/ price, platforms, map, and all the information about one of the most anticipated games of recent years. Learn about the official release, available platforms, details about the world of Leonida and Vice City, new characters, gameplay features, and the latest news from Rockstar Games.
Everything about sports https://nso-online.hu for true fans. Watch live broadcasts, get match results in real time, read the latest news, analytical articles, tournament reviews, and follow the achievements of your favorite teams and players.
Play for free poki.hu right in your browser without installing any additional software. A huge selection of games across various genres: action, logic, sports, racing, simulation, and adventure. Find your favorite games and enjoy online gaming.
The 2025/26 La Liga https://www.laliga-tabella.hu standings feature up-to-date data for all teams in the Spanish league. Track points, matches played, wins, draws, and losses, as well as explore matchday results, game schedules, and season statistics.
The latest sports news https://nemzeti-sport-online.hu/ live streams, and competition results from around the world. Football, Formula 1, tennis, hockey, basketball, and other sports. Match schedules, team statistics, tournament highlights, and key daily events.
UEFA Champions League 2025/26 http://www.uefa-bl.hu the latest standings, match schedule, results, and detailed tournament statistics. Follow the season, check live results, explore the playoff bracket, and find out about tickets for the final of Europe’s premier club competition.
Learn more here: מחירי שירותי ליווי
кадровые агентства по подбору кадровые агентства по подбору персонала
лента стальная нержавеющая лента стальная нержавеющая
All the best stuff is here: נערות ליווי
Текущие рекомендации: https://slovarsbor.ru/w/%D1%8F%D0%B3%D1%80%D0%B0/
Самое важное сегодня: https://home-parfum.ru/catalog/30ml-s-feromonami/
Только лучшее здесь: https://sam0delki.ru
Самое важное сегодня: https://chayblog.ru/info/sekonomit-nachae/
Выбор онлайн займ на карту быстро начинается прежде всего с внимательного сравнения предложений, и специально для данной цели подготовлен наш информационный сервис. Мы собрали и регулярно актуализируем информацию по 35 лицензированным МФО, которые осуществляют деятельность в соответствии с требованиями действующего законодательства и предоставляют займы со ставкой не выше 0,8% в день. На одной странице можно сравнить сумму, срок, требования к заемщику, условия первого займа и скорость получения денег. После выбора подходящего предложения вы можете оформить займ онлайн на карту и получить до 30 000 рублей очень быстро. Многие компании рассматривают заявки 24/7, а решение по анкете часто поступает в течение нескольких минут. Для оформления обычно нужны паспорт, банковская карта и возраст от 18 лет.
Все подробности по ссылке: https://simgallery.ru
вызов электрика москва электрик с выездом
Хочешь клубнику? свежая клубника свежие, спелые и ароматные ягоды по выгодным ценам. Сезонная клубника от проверенных поставщиков, оптовые и розничные продажи, быстрая доставка по городу и области.
Ремонт грузовых автомобилей https://minskdiesel.by в Минске? Сервис «Дизель Практик» вернёт технику в строй в кратчайшие сроки! Срочный ремонт, выездная диагностика, запчасти в наличии. Доверьтесь профессионалам с многолетним опытом — надёжность и прозрачность на каждом этапе.
частный нарколог анонимно нарколог недорого
платный наркологический центр вызов частного нарколога
врач нарколог выезд нарколога на дом круглосуточно
нарколог на дом вывод из запоя цена нарколог клиника
выездная наркология анонимный нарколог
The 2025/26 Premier League premier-league-tabella.hu table, featuring the current standings, points totals, and match results. Follow the battle for the championship, European places, and league status. Game schedules, statistics, matchday overviews, and the latest season data are available.
NBA standings http://www.nbi-tabella.hu/ match results, game schedule, and the latest basketball season news. Follow conference standings, player stats, game results, the tournament schedule, and all the important events of the National Basketball Association.
The latest NBA nb1-tabella.hu standings with match results, schedule, and the latest basketball news. Learn about team and player achievements, track standings, explore statistics, and get highlights of the season’s most exciting games.
NBA news nb2 tabella game results, schedules, and the latest season standings. Get the latest information on teams, players, and the tournament, analyze statistics, and follow the championship race and playoff progress.
The latest Liverpool news liverpool-meccs.hu fixtures, and season results. Get up-to-date information on team performances, lineup changes, player achievements, match statistics, and key events in English and European football.
Liverpool’s league table liverpool tabella shows the team’s current standings, points earned, and form. Follow the team’s latest match results, win/loss statistics, season dynamics, and the battle for top spots in the standings.
Купите кофемашины https://incoffeein.by кофе и чай в Минске с гарантией качества и удобной доставкой. Большой ассортимент моделей для дома и офиса, свежий кофе разных сортов, ароматный чай, расходные материалы и профессиональная помощь в выборе.
Нужен надежный склад https://www.04598.com.ua/list/557893 для вашего бизнеса? Предлагаем ответственное хранение товаров, паллет, оборудования и грузов. Современные складские комплексы, круглосуточная охрана, учет остатков и оперативная обработка заказов. Оптимизируйте логистику и сократите расходы вместе с нами!
тату салон рядом со мной тату салон спб рядом
Автоматизация бизнеса https://dzen.ru/a/ajP1_p5mrQdWbMuZ 7 примеров с ИИ, где нейросети окупаются за месяц: поддержка клиентов, бронирование с оплатой в чате, компьютерное зрение на производстве. Реальные цифры и сроки окупаемости, без хайпа.
тату салон санкт петербург сделать тату в спб
Emprestimos p2p lending: uma analise das principais plataformas. Compare as taxas, os montantes minimos de investimento, as categorias de emprestimos disponiveis, os retornos, os mecanismos de protecao do investidor e as principais caracteristicas de cada servico.
Un analisis de las plataformas de crowdfundinginmobiliario-review.es en Espana para 2026 te ayudara a elegir la mejor opcion de inversion. Analizamos los servicios mas populares, las condiciones de participacion, los tipos de proyectos, la rentabilidad potencial, los riesgos y los beneficios de la inversion colectiva en bienes raices.
Une comparaison de plateformecrowdfunding.fr plateformes pour les investisseurs et les emprunteurs a l’heure de 2026. Les frais, les investissements minimums, les types de projets, les niveaux de fiabilite, les rendements attendus, les exigences legales et les criteres de selection sont abordes.
Uma analise do crowdfunding imobiliario em Portugal. Analise dos termos, montantes minimos, tipos de imoveis, riscos, rendibilidades e caracteristicas do mercado em 2026.
Ce guide des pretparticipatiffrance.fr en France vous aidera a choisir la plateforme la plus adaptee a vos besoins. Nous analysons les conditions, la rentabilite, les risques, les exigences pour les participants, les methodes de financement et les principales differences entre les services les plus populaires.
Decouvrez les meilleurs projets plateforme de crowdfunding en France en 2026. Comparez les types de projets, les conditions d’investissement, les frais, les rendements potentiels, les niveaux de risque et les avantages pour l’investisseur.
Aprende como funciona crowdfundinginmobiliarioespana.es desde elegir una plataforma y un activo hasta generar ingresos. Un resumen de los modelos de inversion, los montos minimos, los terminos, las comisiones, los riesgos y los beneficios para los inversores privados.
софит пвх гранд лайн фасадная плитка хауберг от технониколь
Дополнительная информация: https://spainslov.ru/site/word/word/%D0%9E%D0%9F%D0%90%D0%AF%D0%A2%D0%AC
Read More: Exploring Ancient World Cultures
Последние публикации: https://slovarsbor.ru
Последние обновления: https://chayblog.ru/teanews/kofe-mcdonalds/
Только лучшие материалы: https://amaliya-parfum.ru
Today’s highlights are here: Mattathias Antigonus Biblical Coins
Самое полезное для вас: https://spainslov.ru/site/word/word/%D0%AF%D0%94%D0%A0%D0%9E
Современная спецтехника https://u-misti.chernivtsi.ua/mini-ekskavatori-lonking/ помогает эффективно выполнять строительные, дорожные и производственные работы. Экскаваторы, погрузчики, катки и другая техника позволяют сократить сроки реализации проектов, повысить производительность и снизить затраты на выполнение сложных задач.
Como investir em crowdfundingimobiliario-guide.com em Portugal atraves de plataformas de crowdfunding em 2026. Compare servicos, analise termos, investimento minimo, potencial de lucro, riscos, imoveis disponiveis e criterios para escolher uma plataforma fiavel.
Como investir em crowdfunding inmobiliario em Portugal atraves de plataformas de crowdfunding em 2026. Compare servicos, analise termos, investimento minimo, potencial de lucro, riscos, imoveis disponiveis e criterios para escolher uma plataforma fiavel.
Перед началом строительства https://5стен.рф важно сравнить проекты, материалы и стоимость работ. Подробную информацию о строительстве домов и коттеджей можно найти на сайте.
подписчики в телеграм сервисы накрутка подписчиков в Телеграм
Just published: ripper casino
Looking for information about artists or concerts? Head to http://prosportsmusic.com – your best choice for finding music content.
More on our website: https://pneumec.in/bonus-terms-and-wagering-requirements-explained-for-aussies/
Медицинский справочник https://medoops.ru болезней и лекарств с описанием симптомов, причин, методов диагностики и лечения. Информация о препаратах, показаниях, противопоказаниях и рекомендациях для общего ознакомления.
Latest Updates: https://encorelabs.digital
Right now: https://tampontrust.digital
Ударно-волновая терапия https://novogireevo-klinika.ru в Пушкино — эффективный метод лечения хронической боли, воспалений сухожилий и суставов. Консультация врача, подбор курса процедур, современное оборудование, комфортные условия и профессиональный подход к восстановлению здоровья.
Today’s Focus: https://piscaryflux.click
Read the Extended Version: https://burhtrustai.click
Драфт-сюрвей https://eurogal-surveys.ru независимый расчет массы груза по осадке судна перед погрузкой и после выгрузки. Точные измерения, международные методики, квалифицированные сюрвейеры, официальные отчеты и контроль количества груза для морских перевозок.
Аренда квартир в СПб https://arenda-kvartir78.ru на длительный срок и посуточно. Большой выбор квартир в разных районах Санкт-Петербурга, проверенные объявления, удобный поиск по цене, площади и расположению. Найдите комфортное жилье без лишних сложностей.
Лучший лагерь в подмосковье с английским языком — идеальный вариант для родителей из Москвы. Удобное расположение, чистый воздух, комфортные корпуса и сильная языковая программа. Дети отдыхают рядом с домом и заметно подтягивают английский за смену.
Квартиры в новостройках https://novostroyka78.ru Курортного района СПб с удобным поиском по цене, площади и срокам сдачи. Современные жилые комплексы, экологичная локация, близость парков и Финского залива, выгодные ипотечные программы и предложения от застройщиков.
Все подробности: https://betpolinvest.ru
Магазин бытовой химии https://himiya-v-dom.ru с большим выбором товаров для дома. Моющие и чистящие средства, стиральные порошки, гели, средства для кухни и ванной, товары для уборки, личной гигиены и ухода за домом по выгодным ценам.
Лучшая онлайн онлайн школа по английскому языку YES Center — это полноценное обучение в дистанционном формате. Живые уроки с преподавателем, разговорная практика и удобное расписание. Вы получаете тот же результат, что и в очном классе, но без дороги.
Последние изменения: https://betonkupit.ru
Business sales funnel web2app.tools side-by-side funnel builder comparisons
Creating a sales funnel funnel audience and lead tracking
Лучшее прямо здесь: https://remontpodomy.ru
Изучай английский для детей в YES Center — это весело и эффективно. Игровой формат, опытные педагоги и небольшие группы помогают малышам полюбить язык с первых занятий. Программы подобраны по возрасту, чтобы обучение шло легко и в радость.
Хотите учиться, не выходя из дома? онлайн курсы по английскому от YES Center подходят и взрослым, и детям. Современная платформа, продуманная программа и обратная связь от педагога делают обучение эффективным и комфортным. Старт групп каждый месяц.
Изучай английский онлайн — современный способ освоить язык из любой точки мира. В YES Center занятия проходят в живом формате с преподавателем, поэтому вы быстро преодолеете языковой барьер и начнёте говорить. Попробуйте бесплатный вводный урок.
Последние обновления: https://l-parfum.ru
Читать далее: https://frenchspeak.ru/letter/%d0%9e%d0%a8
Читать расширенную версию: https://perfumerio.ru/s/haute-fragrance-company-wear-love-everywhere/
Хотите учиться, не выходя из дома? онлайн курсы по английскому от YES Center подходят и взрослым, и детям. Современная платформа, продуманная программа и обратная связь от педагога делают обучение эффективным и комфортным. Старт групп каждый месяц.
услуги безопасности охраны услуги государственной охраны
телефон охранного агентства охранное агентство алматы
Everything for Minecraft https://topminecraftworldseeds.com in one place: mods, skins, maps, texture packs, and the best seeds for survival, creativity, and adventure. Collections of popular add-ons, installation instructions, updates, and secure downloads for different versions of the game.
Лучший выбор дня: https://elicebeauty.com/parfyumeriya/byudzhetnaya-parfyumeriya/versii-aromatov/ascania-magic-night.html
Текущие рекомендации: https://spainslov.ru/site/word/word/%D0%A1%D0%A3%D0%A1%D0%9B%D0%9E
пхукет аренда авто аренда авто бангкок пхукет
download ggbet https://ggbet-top.pl/ggbet/
download ggbet https://ggbet-top.pl/ggbet/
Ищешь ключ TF2? tf2 lavka выберите подходящее предложение и оформите покупку за несколько минут. Быстрая доставка, безопасная оплата, удобный интерфейс и актуальная информация о наличии ключей.