Can You Heat Press Nylon? Tips and Tricks for Success
Yes, you can heat press nylon, but it needs careful handling due to its low melting point. You must keep the temperature between 275-300°F and limit press time to 10-15 seconds to avoid scorching the fabric. Always use a protective sheet, like Teflon or parchment paper, to shield it from direct heat.
Pre-testing on scrap fabric is wise to ensure the design transfers correctly. Opt for HTV designed for low temperatures for the best results. If you’re using nylon garments like jackets or bags, proper preparation and technique ensure successful transfers.
To truly master the process, there’s more to explore about heat pressing nylon.
What Is Nylon and Why Is It Tricky to Heat Press?

Nylon is a synthetic polymer known for its strength and versatility, but it can be tricky to heat press due to its low melting point and tendency to scorch. When you’re working with nylon, understanding its properties is crucial to avoid damaging your fabric.
Nylon’s melting point is significantly lower than that of other materials like cotton or polyester, which makes it more susceptible to high heat. This means that if you’re not careful, you could end up with a warped or discolored surface.
Additionally, nylon fibers are prone to scorching, especially if the heat is applied too long or too intensely. It’s also important to note that nylon doesn’t respond well to direct heat, so a protective cover sheet or a Teflon sheet is often recommended to prevent direct contact with the heat press. This helps distribute the heat more evenly and reduces the risk of scorching.
Because of its low melting point, you need to be vigilant about the temperature settings on your heat press. It’s essential to keep the temperature low and the press time short. By doing so, you’re more likely to achieve a successful transfer without damaging the nylon fabric.
Can You Heat Press on Nylon?
Yes, you can successfully heat press on nylon by carefully controlling the temperature and using protective materials. Nylon’s lower melting point means it’s crucial to set your heat press to a temperature around 275-300°F.
Going too high might damage the fabric, causing it to melt or warp. It’s also essential to use a pressing sheet or Teflon cover to shield the nylon from direct heat, preventing scorch marks or unwanted texture changes.
Before you start, always pre-test on a scrap piece of nylon or an inconspicuous area of the garment. This helps ensure that your chosen settings won’t harm the material. When you’re ready, apply firm, even pressure for a short duration, usually around 10-15 seconds, but be sure to follow specific instructions for the transfer material you’re using.
Additionally, selecting the right kind of heat transfer vinyl (HTV) is vital. Not all HTVs are suitable for nylon, so opt for those specifically designed for low-temperature applications. Once you’ve finished, allow the design to cool completely before handling it. This helps ensure the adhesive sets properly, giving your design longevity and durability on the nylon fabric.
What Nylon Garments Can You Print On?
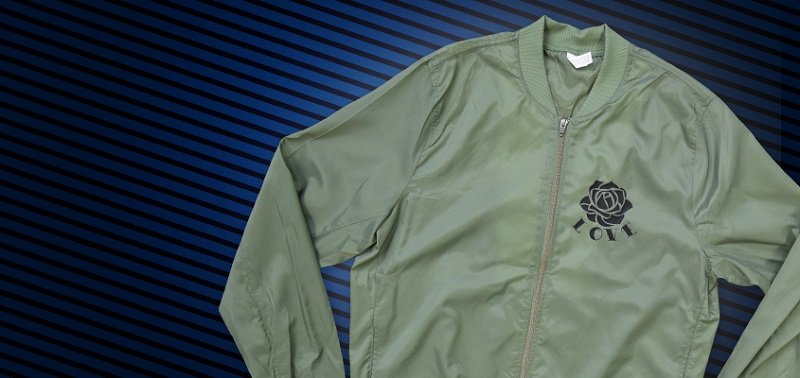
Many garments, from jackets to bags, can be printed on with ease as long as you account for nylon’s sensitivity to heat. Nylon jackets are quite popular for printing, especially sports and team jackets, where you can add logos or personalized designs.
Bags, like backpacks and tote bags, are another great choice, allowing for customization that stands out. Athletic wear, including shorts and leggings, is also commonly made from nylon, providing opportunities to print motivational quotes or logos.
When considering printing on nylon shirts, it’s crucial to ensure the fabric’s weave and thickness can handle the heat press process without damage. Windbreakers and raincoats, made from water-resistant nylon, are perfect for printing functional designs or logos. Nylon umbrellas offer a unique canvas for branding or creative designs, though they require careful handling due to their tricky shape.
You should be mindful of the fabric’s composition, as some nylon blends might react differently to heat. Always check the garment’s label for any special instructions. With careful planning, you can create stunning, personalized nylon garments that stand the test of time. Just remember, patience and precision are key when working with this versatile material.
Step-by-Step Guide to Heat Pressing on Nylon
To successfully heat press on nylon, you’ll start by preparing your materials, ensuring everything is ready for a smooth process. Next, set up your heat press with the correct temperature and pressure settings to accommodate nylon’s sensitivity. After pressing the nylon, proper post-pressing care will help maintain your design’s longevity and vibrancy.
Preparing Your Materials
Gather all necessary materials, including the nylon fabric, heat transfer vinyl, heat press machine, and protective sheet. Make sure the nylon fabric is clean and dry to ensure optimal adhesion. Any dirt or moisture can affect the final result, so give it a quick check before you start.
Next, cut your heat transfer vinyl design according to your desired size and shape. Use a good quality vinyl cutter to ensure precision. Once cut, weed out the excess vinyl material, leaving only the design you want to transfer. This might require a bit of patience, especially for intricate designs, but it’s crucial for a clean finish.
Now, take your protective sheet, often a Teflon or parchment paper, and have it ready. This sheet will act as a barrier between the heat press and the vinyl, preventing direct contact and potential damage. It’ll help distribute the heat evenly across the design, ensuring a smooth transfer.
Double-check that all your materials are within reach and organized. This way, you won’t scramble to find something in the middle of the process. Being prepared will make the entire heat pressing experience smoother and more efficient.
Setting Up Your Heat Press
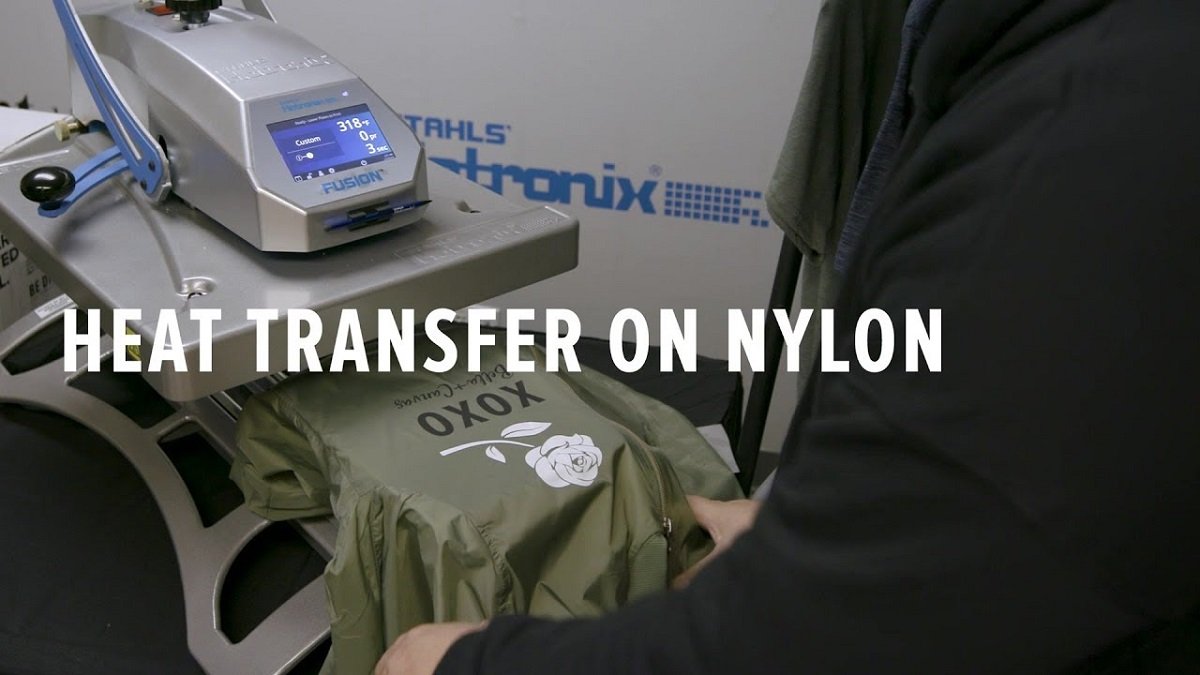
With all your materials ready, it’s time to set up your heat press for applying the vinyl design onto nylon. First, plug in your heat press and switch it on. Set the temperature to around 305°F (152°C), which is typically ideal for nylon. However, always check the vinyl manufacturer’s instructions, as they might suggest a slightly different temperature.
Next, adjust the pressure setting on your heat press. Nylon is more delicate than cotton, so you’ll want a medium pressure. Too much pressure can scorch the fabric, while too little might not fully adhere the vinyl. Most heat presses have a knob or a digital setting you can adjust; refer to your machine’s manual if you’re unsure.
Once the temperature and pressure are set, ensure the heat press is clean. Any residue or debris on the platen can transfer onto the nylon, affecting the final result. Wipe down the platen with a clean, lint-free cloth if necessary.
Pressing the Nylon
Once your heat press is ready, position the nylon fabric flat and smooth on the lower platen. Ensure there are no wrinkles or folds, as these can affect the final outcome. Next, place the transfer paper or vinyl design on the nylon fabric where you want it applied. Double-check its alignment to avoid any mishaps during pressing.
Before you press down, consider these crucial points:
- Temperature: Nylon is heat-sensitive, so set the press to a lower temperature, around 275-300°F, to prevent melting or scorching.
- Pressure: Use medium pressure to ensure the design adheres well without damaging the fabric.
- Time: Keep the pressing time between 5-10 seconds to avoid overheating the nylon.
- Protective Sheet: Use a Teflon sheet or parchment paper over the design to protect both the press and fabric.
Once everything is set, lower the heat press with steady, even pressure. Keep an eye on the timer, and once the designated time is up, gently lift the press. Be cautious as the area will be hot. Let the fabric cool slightly before peeling off the transfer paper. You should now have a well-adhered design on your nylon fabric.
Post-Pressing Care
After successfully pressing your design onto nylon, it’s important to let the fabric cool completely before handling or stretching it to ensure the best adhesion and longevity of the print. Rushing this step can lead to issues like peeling or cracking, which you definitely want to avoid. Once the fabric has cooled, gently check the edges of your design to make sure they’re securely attached.
To maintain your design, always wash the nylon garment inside out. Use cold water and a gentle cycle to prevent any damage to the print. When it comes to drying, air drying is your safest bet. If you must use a dryer, opt for the lowest heat setting to avoid melting or distorting the design.
Ironing may occasionally be necessary, but always place a protective cloth or parchment paper over the design to protect it from direct heat. If possible, iron the garment inside out. Avoid using bleach or harsh detergents as they can weaken the material and fade your design.
Tips When Printing On A Nylon
When printing on nylon, it’s crucial to practice beforehand to get the best results. Start with a low temperature and opt for a thin heat transfer vinyl (HTV) to prevent fabric damage. Don’t forget to use a Teflon sheet or parchment paper, especially when pressing multiple layers, to ensure a smooth finish.
You Need To Practice!
Mastering the art of printing on nylon requires patience and a bit of trial and error to perfect your technique. Nylon can be tricky because it’s sensitive to heat and may warp or scorch if not handled correctly. You’ll need to practice to find the perfect balance between heat, pressure, and timing. Remember, practicing on a scrap piece of nylon is always better than making mistakes on your final product.
Here are a few tips to keep in mind as you hone your skills:
- Test on a Scrap: Always test your design on a scrap piece of nylon. This way, you can see how the material reacts without risking damage to your final piece.
- Adjust Pressure: Nylon may require different pressure settings than other materials. Experiment to find what works best for your project.
- Monitor Time Closely: Keep an eye on the time as you heat press. Too long, and you might ruin the fabric; too short, and the print may not adhere properly.
- Observe Temperature Reactions: Pay attention to how the nylon reacts to different heat levels and adjust accordingly.
With practice, you’ll become more confident, and your prints will improve significantly.
Start With A Low Temperature
To prevent damage to nylon fabric, it’s crucial to begin with a low temperature when heat pressing. Nylon is a synthetic material that can easily melt or become distorted if subjected to excessive heat. Starting with a lower temperature minimizes the risk of ruining your fabric, ensuring a clean and professional finish.
It might take a bit longer, but the slower approach is worth it to maintain the integrity of your material.
Here’s a quick reference table to help guide your initial settings:
| Setting | Recommended Range |
|---|---|
| Temperature | 275°F – 300°F |
| Pressure | Light to Medium |
| Time | 10 – 15 seconds |
| Peel Method | Cold Peel |
| Fabric Condition | Pre-washed |
Begin with the lowest temperature in the range, gradually increasing if needed. Watch closely for any signs of melting or distortion. This table acts as a safety net, helping you gauge the right settings without trial and error.
By adhering to these guidelines, you can confidently apply heat to nylon without fear of damage. Remember, patience and attention to detail pay off, ensuring your designs turn out just as you envisioned, vibrant and intact.
Use A Thin HTV
After setting the right temperature, opting for a thin HTV (Heat Transfer Vinyl) ensures better adhesion and flexibility on nylon fabrics. Nylon’s smooth and often slippery texture can make it challenging for transfers to stick. A thinner HTV allows the vinyl to conform more closely to the fabric’s contours, enhancing the bond and ensuring crisp, long-lasting designs.
When selecting HTV for nylon, keep these considerations in mind:
- Flexibility: Thin HTV flexes better with the nylon, preventing cracks or peeling over time.
- Adhesion: A thinner material typically adheres more effectively, reducing the risk of lifting.
- Finish: Consider the finish of the HTV. A matte finish can help reduce glare and provide a professional look.
- Ease of Use: Thinner HTV can be easier to work with, especially when layering multiple colors.
Use Teflon Sheet Or Parchment Paper
When printing on nylon, always place a Teflon sheet or parchment paper between the heat press and the fabric to prevent sticking and protect the material. Nylon’s synthetic fibers can be sensitive to heat, and without a protective layer, there’s a risk of melting or damaging the fabric.
This simple step acts as a barrier, ensuring the heat is distributed evenly while safeguarding your nylon garment. Using a Teflon sheet is particularly beneficial because it’s reusable, non-stick, and can withstand high temperatures.
If you’re out of Teflon, parchment paper is a suitable alternative. It’s accessible and provides a smooth surface that helps in transferring the heat evenly. Both options ensure that the heat press doesn’t directly contact the nylon, reducing the likelihood of scorching or leaving unwanted marks.
When Pressing Multiple Layers
For pressing multiple layers on nylon, ensure each layer is adequately aligned and pressed with care to prevent shifting or bubbling. You’ll want each layer to be perfectly positioned because once heat is applied, corrections can be challenging. Use precision tools like alignment rulers or grids to ensure everything is in place.
When working with multiple layers, it’s essential to press each one separately and allow them to cool before adding the next. This avoids unwanted mixing of colors or designs. You should also pay attention to the pressure settings. Too much pressure can cause the layers to bleed into each other or distort your design.
Here are some tips to keep in mind:
- Pre-press the nylon: This removes moisture and wrinkles, providing a smooth surface for layering.
- Use a lower temperature: Nylon is heat-sensitive, so keep the temperature lower to avoid damage.
- Test with a sample: Before full application, test your design on a scrap piece of nylon to ensure quality.
- Peel carefully: After pressing, peel the transfer paper gently to avoid lifting any part of your design.
Avoid Nylon Garments That Are Too Thin
Opt for nylon garments with a slightly thicker weave to ensure better durability and print quality. When a garment is too thin, it might not withstand the heat and pressure applied during the pressing process. Thin nylon can easily warp or melt, which compromises both the fabric’s integrity and your design.
A thicker nylon not only handles the heat better but also provides a more stable surface for transferring your artwork, ensuring it adheres well and looks sharp.
Thin nylon garments can also be more translucent, affecting how your design appears once applied. The color of the fabric might show through, altering the appearance of your print. To avoid unexpected results, choose garments that have enough opacity to allow your design to stand out as intended.
Moreover, when dealing with thinner materials, there’s a risk of uneven heat distribution, leading to poor adhesion of the print. This can result in peeling or fading over time, which isn’t ideal if you want your creations to last. By selecting a slightly thicker nylon fabric, you’re setting yourself up for success, ensuring your prints look professional and withstand the test of time.
You Need To Print On Flat Surface
Ensuring a flat surface is key to achieving vibrant and long-lasting prints on nylon garments. When you’re preparing to heat press, any wrinkles, seams, or uneven areas can disrupt the transfer process, leading to imperfect results.
Start by laying your nylon garment on a sturdy, heat-resistant surface. Use a pressing pillow or a foam pad to help create an even surface if the garment has seams or buttons that could cause pressure imbalances.
Before you start printing, double-check that your workspace is free from obstructions. Here’s a quick checklist to ensure optimal conditions:
- Smooth out wrinkles: Use a handheld steamer or iron on a low setting to remove any creases.
- Align your design: Position your graphic carefully, ensuring it’s straight and centered.
- Secure the garment: Use heat-resistant tape to hold the fabric in place if necessary.
- Check pressure settings: Adjust the press to apply even pressure across the entire design.
Taking these steps ensures that the heat press can work its magic uniformly, avoiding any mishaps that could affect the quality of your print. A consistent, flat surface isn’t just about aesthetics; it’s crucial for the durability of the print, ensuring it withstands wear and washing.
Are Nylon And Neoprene The Same?
While nylon and neoprene might seem similar, they’re actually distinct materials with different properties and uses. Nylon is a synthetic polymer known for its strength, elasticity, and resistance to abrasion. It’s commonly used in textiles like clothing, ropes, and even parachutes due to its lightweight nature and durability. Nylon can handle some heat but requires careful handling if you’re considering heat pressing it.
On the other hand, neoprene is a type of synthetic rubber. It’s highly valued for its flexibility, water resistance, and insulating properties. These characteristics make neoprene ideal for applications like wetsuits, laptop sleeves, and certain types of protective gear. Unlike nylon, neoprene’s structure allows it to handle more extreme conditions, but it doesn’t mean it’s suitable for all heat applications either.
When working with either material, it’s crucial to understand their specific characteristics. You can’t assume that a process suitable for one will work for the other. If you’re planning any kind of heat application, like heat pressing, be sure to adjust your approach based on the material at hand. Always test a small section first to avoid potential damage.
Frequently Asked Questions
What Temperature Should Be Used for Heat Pressing Nylon?
When you’re heat pressing nylon, it’s crucial to set the right temperature to avoid damaging the material. Start with a lower temperature, around 275 to 300 degrees Fahrenheit. Always do a small test press first to see how the nylon reacts. Don’t forget to use a protective sheet to prevent any scorching.
Adjust the pressure and time as needed, because nylon can be a bit tricky. Keep an eye on it!
Are There Specific Heat Press Machines for Nylon?
When you’re thinking about heat pressing nylon, you might wonder if there are specific machines designed just for it. While most heat press machines can handle nylon, you’d want to look for ones with adjustable temperature and pressure settings.
This flexibility lets you fine-tune the machine to suit nylon’s delicate nature. So, no need to buy a special machine, just ensure your current one is versatile enough for various materials.
Can You Use a Regular Iron Instead of a Heat Press on Nylon?
You might be tempted to use a regular iron on nylon, but it’s not always the best idea. Nylon is sensitive to heat, and a regular iron can easily scorch or melt the fabric. If you decide to try it, make sure to use a low heat setting and place a protective layer, like a thin cloth, between the iron and nylon. Always test on a small area first to avoid disasters.
How Long Should Pressure Be Applied When Heat Pressing Nylon?
When you’re heat pressing nylon, applying pressure for the right amount of time is crucial. Typically, you should apply pressure for about 10 to 15 seconds. It’s important to follow specific guidelines for your heat transfer material, as nylon can be sensitive to heat.
Always test a small area first to avoid any damage. Adjust the pressure and time based on your transfer type to ensure a smooth application.
What Type of Transfer Paper Is Best for Nylon?
When choosing transfer paper for nylon, you’ll want to go for one that’s specifically designed for synthetic fabrics. Look for papers that mention compatibility with nylon. Using a paper meant for cotton or other fabrics might not give the best results.
Also, consider the ink type; pigment inks usually work better on nylon. Remember, a good quality transfer paper ensures your design adheres well and lasts longer without peeling or fading.
Conclusion
In conclusion, while heat pressing nylon can be tricky due to its sensitivity to high temperatures, it’s definitely possible with the right approach. Make sure to adjust your heat press settings carefully and use a protective sheet to prevent damage.
Always test on a small area first to avoid mistakes. With patience and practice, you can achieve great results on various nylon garments. Remember, nylon and neoprene aren’t the same, so treat them accordingly for the best outcomes.