How to Heat Press a Shirt
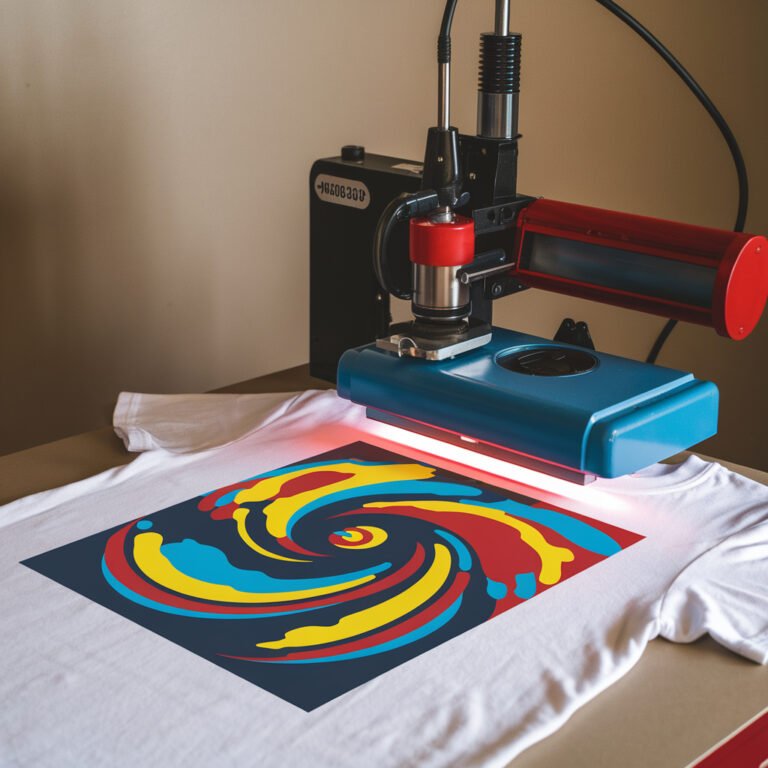
To heat press a shirt, you’ll first need to set up your heat press machine. Adjust the temperature according to the type of fabric you’re using. Make sure the shirt is smooth and place it on a clean, flat surface. Position your transfer paper correctly on the shirt.
Once everything is aligned, apply heat and pressure as recommended—typically a few seconds to ensure the design adheres properly to the shirt. After pressing, carefully peel off the transfer paper while the shirt is still warm.
With these steps, you’ve created a vibrant, lasting design. There’s much more to explore with different techniques and tips.
Understanding Heat Press Basics
To effectively use a heat press, you’ll need to grasp the core concepts of temperature control, pressure, and timing. The right temperature ensures the transfer adheres properly, but too high can burn the fabric. You’ll find that different materials require specific heat settings.
Pressure is equally critical; it must be even and sufficient to create a solid bond between the transfer and your shirt. Without enough pressure, you’ll end up with peeling designs after a few washes. Timing is the final piece of the puzzle.
Each type of transfer might need a different duration under the heat. Too long, and you might scorch the fabric; too short, and the design won’t stick well.
Preparing for Heat Pressing
Before you start heat pressing your shirt, you’ll need to make sure you’ve got everything in place. First, gather all the necessary materials like the heat press machine, the shirt, and transfer paper. Then, ensure your shirt is smooth and wrinkle-free and your design is correctly aligned and ready to be transferred.
Gather Necessary Materials
You’ll need a heat press machine, a suitable shirt, transfer paper, and heat-resistant tape to start your project. Choosing the right materials can make the difference between a faded design and one that pops with color and lasts for years. It’s not just about getting the job done; it’s about creating something you’re proud to wear or share.
Here are a few emotional touchpoints to consider as you gather your materials:
- Excitement: Imagine the pride in wearing a shirt that’s uniquely yours.
- Creativity: Unleash your artistic side with vibrant designs.
- Satisfaction: Feel the joy of crafting something from scratch, knowing every detail is perfectly placed.
Collecting these high-quality materials ensures your project’s success and your personal fulfillment.
Prepare the Shirt
Start by laying your shirt flat on a clean, smooth surface to ensure an even application during the heat pressing process. Smooth out any wrinkles because even the smallest crease can ruin your design. Check the fabric composition of your shirt as well; different materials require different heat settings.
Here’s a quick emotion-evoking guide to help you visualize the importance of each step:
| Step | Why It Matters |
|---|---|
| Flatten | Avoids creases, ensures quality |
| Clean Surface | Prevents dirt transfer |
| Remove Lint | Ensures a clean design surface |
| Check Fabric | Matches correct heat settings |
| Position | Aligns design perfectly |
These steps might seem small, but they’re crucial for a flawless finish. Take your time here—it’s worth it!
Prepare the Transfer Design
Once you’ve prepared your shirt, it’s time to focus on the transfer design itself, ensuring it’s perfectly aligned and free from defects before heat pressing. This step is crucial for achieving that professional look you’re aiming for. Here are a few tips to evoke the passion and excitement of creating something truly unique:
- Visualize the Outcome: Imagine the pride in wearing or gifting a shirt that perfectly captures your creative vision.
- Attention to Detail: Double-check your design for any imperfections that could mar the final product.
- Enjoy the Process: Relish in the artistic journey, knowing each press brings you closer to a beautifully finished piece.
Setting Up the Heat Press Machine
Before you start pressing, you’ll need to properly set up your heat press machine. First, adjust the temperature to match the type of fabric you’re working with. Then, set the pressure adequately and configure the timer according to the thickness and material of your shirt.
Adjusting the Temperature
Adjusting your heat press machine’s temperature is crucial for ensuring optimal transfer quality. It’s the heart of the process, where the magic happens and your creativity comes to life on fabric. It’s not just about setting a dial; it’s about understanding the material you’re working with and the effect you want to achieve.
- Feel the pride as you dial in the perfect settings, knowing each shirt you produce is a reflection of your dedication.
- Experience the excitement of watching your designs transform from digital concepts to vibrant, tangible art.
- Embrace the satisfaction when the correct temperature results in flawless transfers that exceed your expectations and wow your customers or friends.
Setting the Pressure
After setting the temperature, you’ll need to adjust the pressure of your heat press machine to ensure even application and optimal adherence of your design. The right pressure is crucial; too little and your design won’t stick well, too much and you might damage the fabric or the design.
Start by turning the pressure adjustment knob or lever on your machine. If you’re using a manual press, feel the resistance as you close the machine—it shouldn’t be too hard or too easy to close. For a digital machine, input the recommended pressure setting, usually found in the manual.
Do a test press on a scrap piece of fabric or paper to check the pressure is just right before you move on to your actual shirt.
Timer Settings
You’ll next need to set the timer on your heat press machine to ensure the design is applied for the correct duration. Getting the timing right isn’t just a technical step; it’s about bringing your creative vision to life without mishaps. Depending on the material and type of transfer, the time settings can vary significantly:
- Patience Pays Off: Waiting for the timer might feel slow, but it ensures your design bonds perfectly.
- The Moment of Truth: When the timer dings, it’s your cue to discover how well your artwork has transferred.
- Avoid Disappointment: Setting the timer too short might result in undercooked designs that peel off, ruining your effort and materials.
Adjust carefully, and watch as your design becomes a durable, vibrant reality.
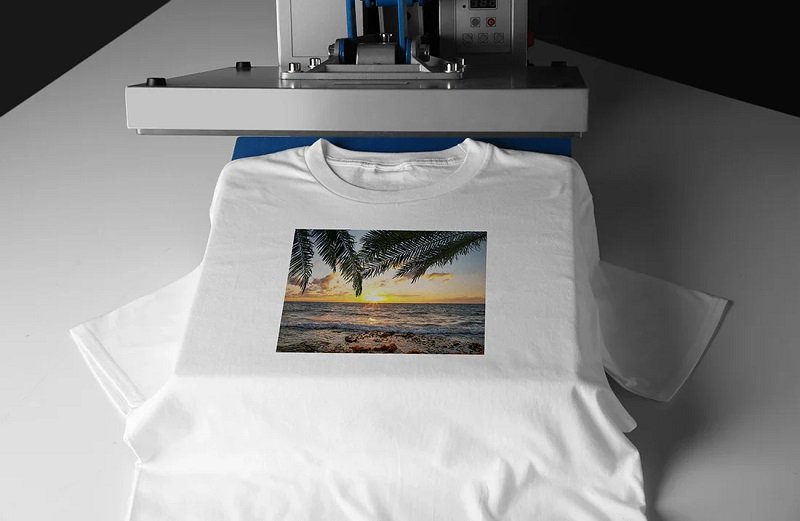
Heat Pressing the Shirt
Now that you’ve set up your heat press machine, it’s time to get your shirt ready. You’ll start by positioning the shirt and the design accurately to ensure everything aligns perfectly. Next, you’ll press the design onto the shirt, applying the right amount of heat and pressure, before carefully removing the transfer to reveal your finished product.
Positioning the Shirt and Design
Before pressing, ensure your shirt’s laid flat and the design’s perfectly aligned where you want it. This step is crucial as it sets the stage for the final outcome. Any wrinkles or misalignments now could lead to a less-than-perfect press. Take your time here; the precision you apply in positioning the design directly influences the quality of your finished product.
- Feel the excitement building as you perfect the placement, knowing your custom creation is just moments away from reality.
- Experience the satisfaction of smoothing out every wrinkle, ensuring nothing stands in the way of a flawless finish.
- Anticipate the pride you’ll feel wearing or gifting something uniquely crafted by your own hands.
Approach this step with care and patience—it’s worth it!
Pressing the Design
Once your shirt and design are perfectly aligned, it’s time to press. Lower the heat press onto your shirt, making sure the pressure is evenly distributed. This step is crucial; uneven pressure can lead to parts of your design not adhering properly. Check your press’s settings—temperature should typically range between 320°F to 350°F, and time varies from 10 to 20 seconds depending on the thickness and material of your shirt.
After setting the timer, press down firmly. You’ll hear a beep when it’s done. Lift the press gently to avoid shifting the shirt or design. If your press has a pressure reading, aim for medium to high pressure to ensure the design transfers completely and evenly.
Removing the Transfer
Carefully peel off the backing paper while the shirt is still warm to ensure the design has transferred smoothly. This moment is crucial; you’re not just peeling away a layer, you’re unveiling your creative masterpiece. To make sure you’re doing it right, here are a few emotional checkpoints to guide you:
- Anticipation: As you start to peel, the excitement builds. What will the finished product look like?
- Relief: Seeing your design properly adhered, without any tears or misalignment, is a huge relief.
- Pride: There’s a profound sense of achievement in seeing your vision transformed into reality on this shirt.
Post-Pressing Tips
Once you’ve finished heat pressing your shirt, it’s crucial to inspect it for any inconsistencies or heat marks. Be sure to follow specific care instructions to maintain the quality and longevity of the print. This will ensure your shirt looks great and lasts through many wears and washes.
Inspect the Finished Shirt
After pressing, you’ll want to check the shirt for any uneven heat marks or misaligned designs. Carefully examine each part of the transferred image. Look for clarity and vibrancy in the colors, ensuring they’ve adhered well without bleeding or spreading outside intended borders.
- Joy of Perfection: Imagine the pride in wearing or gifting a flawlessly pressed shirt, reflecting your dedication and skill.
- Relief of Success: Feel the relief wash over you as you find no errors, confirming that your efforts have produced a high-quality result.
- Frustration of Flaws: Prepare for potential disappointment if you spot issues, but remember each mistake is a stepping stone to mastering the heat press technique.
Take this moment to appreciate your work and learn from the process.
Care Instructions
To ensure your shirt remains in top condition, follow these essential post-pressing care tips. First off, don’t rush to wash it. Wait at least 24-48 hours after pressing, allowing the design to fully set. When you do wash, turn the shirt inside out to protect the print.
Opt for cold water and a gentle cycle to prevent the design from cracking or peeling. Avoid harsh detergents and fabric softeners, as they can degrade the print quality over time.
It’s best to air dry your shirt. If you must use a dryer, choose a low heat setting. Finally, when ironing, never press directly on the design. Instead, use a thin cloth barrier or turn the shirt inside out.
Frequently Asked Questions
Can I Heat Press Over Shirt Buttons or Zippers?
You should avoid heat pressing directly over shirt buttons or zippers, as the high heat can damage them or leave uneven impressions on the fabric. Instead, use a heat press pillow or pad to raise the print area and avoid the buttons or zippers.
This ensures even pressure and heat distribution during the pressing process, helping you achieve a smooth, professional finish on your garment without harming its components.
How Do I Avoid Heat Press Marks on Polyester?
To avoid heat press marks on polyester, you’ll want to use a protective cover like a Teflon sheet or parchment paper between the fabric and the press. Make sure your heat settings aren’t too high—polyester requires a lower temperature than cotton.
It’s typically best to press at around 270-300°F. Additionally, don’t press for too long; a quick press duration, generally 10-15 seconds, should suffice to prevent scorching or marks.
What Alternatives Exist for Heat Press Machines?
If you’re looking for alternatives to heat press machines, consider using a household iron or a sublimation printer. An iron can work well for smaller, simpler designs, though it requires careful temperature and pressure control.
Sublimation printers, on the other hand, are great for detailed and colorful patterns but work best on polyester fabrics. Both options are more accessible and can be suitable depending on your project’s needs and the materials you’re using.
Can Heat Pressing Remove Existing Wrinkles?
Yes, heat pressing can effectively remove existing wrinkles from your shirt. When you apply heat and pressure to the fabric, it smooths out creases, giving it a neat and crisp appearance. Just make sure you adjust the heat press settings according to the type of fabric you’re working with to avoid any damage.
This method is quick and efficient, perfect for when you need your clothes to look their best without much hassle.
Is It Safe to Heat Press Vintage or Delicate Fabrics?
You should be cautious when dealing with vintage or delicate fabrics. These materials can be sensitive to high heat and pressure, which might cause damage. It’s best to check the care label for specific instructions or test a small, inconspicuous area first.
If you’re unsure, consider using a lower temperature and less pressure, or opt for an alternative method like steaming to avoid harming the fabric. Always prioritize the garment’s care instructions.
Conclusion
Now that you’ve mastered the art of heat pressing, you’re ready to dazzle with your custom shirts! Always remember to let your creation cool before showing it off. This ensures the design sets perfectly. Keep experimenting with different fabrics and designs to refine your technique.
And don’t forget, practice makes perfect, so keep pressing! With each shirt, you’ll find it gets easier and your results more impressive. Enjoy unleashing your creativity and watching your designs come to life!