How to Heat Press Patches on Hats
To heat press patches on hats, pick a cotton or polyester blend hat with a firm front panel for best results. Use heat-resistant patches with iron-on backing, like twill or polyester. Clean the hat and position the patch securely. Use a hat press attachment with medium pressure, the right temperature, and time setting suited to your materials. After pressing, let it cool flat to set properly. Keep your hat in shape and conditions for lasting wear. Stick around to discover more detailed tips.
Key Takeaways
- Choose hats made of cotton, polyester blends, or canvas with firm front panels for best patch adhesion during heat pressing.
- Use heat-resistant patches with iron-on backing, such as twill or polyester, to ensure durability and proper bonding.
- Clean and position the patch carefully on the hat, securing it with tape or pins to prevent shifting before pressing.
- Use a heat press with a hat attachment, set to medium pressure and appropriate temperature/time for the patch material.
- Allow the hat and patch to cool flat for 5-10 minutes before handling, then clean gently and store properly to maintain patch adhesion.
Choosing the Right Hat for Heat Pressing
When choosing the right hat for heat pressing, you’ll want to contemplate the material carefully, since not all fabrics can handle the high temperatures involved. Hats made from cotton, polyester blends, or canvas typically work well because they tolerate heat without melting or warping. Avoid hats with synthetic materials like nylon or vinyl that can easily get damaged or lose shape under pressure. Also, consider the hat’s structure—stiffer hats with a firm front panel hold patches better than soft, unstructured ones. Make certain the hat’s size and shape allow the heat press to make consistent contact without bending or creasing the fabric. By selecting a compatible hat, you’ll guarantee your patch adheres smoothly and lasts longer.
Selecting the Perfect Patch Material
Picking the right hat sets the stage, but choosing the perfect patch material is just as important for a lasting bond. You’ll want to pick a patch made from heat-resistant fabric, like twill or polyester, since these handle the press’s high temperatures without warping or melting. Avoid delicate materials like silk or thin cotton, which can scorch easily. The patch backing matters, too—heat-seal or iron-on backings work best for a strong, clean adhesion. Embroidered patches offer durability and a professional look, while woven patches provide finer detail but might require extra care. Also, consider the patch’s thickness; thicker patches need more pressure and time. By selecting the right material, you guarantee your patch stays vibrant and securely attached, making your hat look sharp and last longer.
Preparing Your Hat and Patch for Heat Pressing
Before you start, make certain your hat’s material can handle the heat press without damage. Clean the area where you’ll place the patch and position it carefully for the best look. Finally, preheat your equipment and do a quick test to verify everything’s set correctly.
Choose Suitable Hat Material
Since not all hats are made equal, you’ll want to select one with a material that can withstand the heat press without damage. Hats made from cotton, polyester, or a cotton-poly blend are generally ideal because they tolerate heat well. Avoid hats with synthetic fabrics like nylon or certain plastics, as they can melt or warp under high temperatures. Also, steer clear of hats with foam fronts or delicate decorations that could get ruined by the heat press. If you’re unsure, check the hat’s care label for heat sensitivity or test on a small, hidden area first. Choosing the right material guarantees your patch adheres properly and your hat stays in great condition after pressing. This step sets the foundation for a successful heat press application.
Clean and Position Patch
When you’re ready to apply your patch, make certain both the hat and patch are clean and free of dust or oils that could affect adhesion. Use a lint roller or a slightly damp cloth to remove any particles. Position your patch carefully on the hat’s surface, guaranteeing it’s centered or aligned as desired. Use heat-resistant tape or pins to hold it in place if needed.
| Step | Tool Needed | Tip |
|---|---|---|
| Clean Surface | Lint roller/cloth | Remove dust/oils thoroughly |
| Align Patch | Ruler or template | Check symmetry and placement |
| Secure Patch | Heat tape/pins | Prevent shifting during press |
Proper preparation guarantees a neat, durable application with maximum adhesion.
Preheat and Test Equipment
Three key steps will confirm your heat press is ready for the job: preheating the machine, testing temperature accuracy, and verifying pressure settings. Start by turning on your heat press and allowing it to reach the recommended temperature for your patch material, usually between 320°F and 350°F. Next, use an external digital thermometer or temperature strip to confirm the heat press’s actual surface temperature matches the set value. This confirms consistent, even heating. Finally, adjust the pressure dial or knob to the manufacturer’s suggested setting—too much pressure can damage your hat, while too little might cause poor adhesion. Taking these steps confirms your equipment is accurately calibrated, preventing mistakes and ensuring your patch adheres securely with a professional finish.
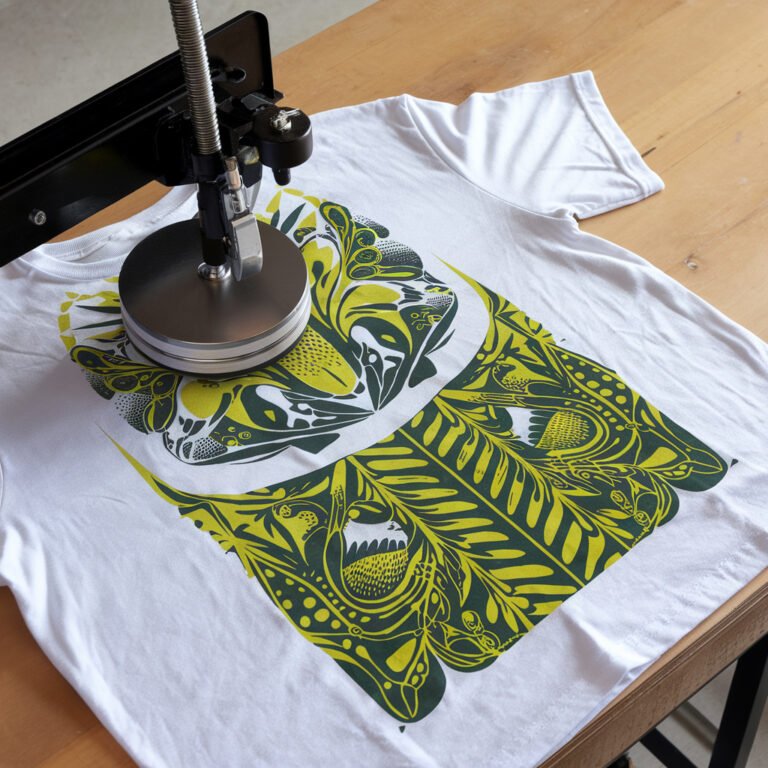
Setting Up Your Heat Press Machine
Before you start pressing patches on hats, you’ll need to confirm your heat press machine is properly set up for the task. First, verify your machine has a hat press attachment or a curved platen designed specifically for hats. This setup helps apply even pressure on the curved surface. Attach the platen securely and double-check its alignment. Next, adjust the temperature and time settings according to your patch’s material—usually around 320°F for 10-15 seconds works well. Set the pressure to medium, but be ready to tweak it based on your hat’s fabric thickness. Finally, make sure the heat press is on a stable surface and plugged in safely. Proper setup prevents damage and guarantees a clean, durable bond between patch and hat.
Positioning the Patch on the Hat
Although it might seem straightforward, positioning the patch correctly on your hat is crucial for a professional look. You want the patch to sit flat, centered, and aligned perfectly to avoid any awkward angles or unevenness. Here’s how to get it right:
- Identify the front center panel of the hat where the patch will be applied.
- Use a ruler or measuring tape to find the exact middle point.
- Place the patch so it aligns symmetrically with the hat’s seams.
- Pin or use a heat-resistant tape to hold the patch in place.
- Double-check the placement in a mirror or with a photo before pressing.
Taking these steps guarantees your patch looks neat and enhances the hat’s overall appearance.
Adjusting Temperature and Time Settings
When you’re ready to heat press your patch onto the hat, you’ll need to adjust the temperature and time settings carefully to secure a strong bond without damaging the fabric. Typically, a temperature between 320°F and 350°F works well for most patches and hat materials. However, always check the patch and hat manufacturer’s guidelines first. Set the timer for about 10 to 15 seconds as a starting point. If the patch doesn’t adhere properly, increase the time by a few seconds, but avoid exceeding 20 seconds to prevent scorching. Keep in mind that thicker patches or hats with unique materials may require slight adjustments. Testing on a scrap piece before pressing your final hat helps confirm you get the settings just right.
Using Protective Materials During Heat Pressing
To protect your hat and patch during heat pressing, you’ll want to use the right materials like Teflon sheets or parchment paper. These barriers help prevent direct heat damage and keep your patch looking sharp. Choosing the proper protective layer is key to getting a clean, lasting press without scorching your hat.
Choosing Protective Materials
Since heat pressing involves high temperatures and pressure, you’ll need to choose the right protective materials to prevent damage to both the patch and the hat. Selecting appropriate materials guarantees even heat distribution and protects delicate fabrics from scorching or melting. Here are some common protective materials you should consider:
- Teflon sheets: Non-stick and heat-resistant, perfect for shielding patches.
- Parchment paper: Affordable and disposable, prevents direct contact with heat.
- Silicone mats: Durable and reusable, distribute heat evenly.
- Cotton fabric: Natural fiber that can act as a buffer without melting.
- Heat-resistant gloves: Protect your hands while handling hot materials.
Using these materials correctly helps maintain the quality of your patches and hats during the heat pressing process.
Preventing Heat Damage
Although heat pressing patches on hats requires high temperatures, you’ll want to use protective materials to prevent scorching or melting. Start by placing a Teflon sheet or a thin cotton cloth over the patch before applying heat. These barriers distribute heat evenly and shield both the patch and hat fabric. Avoid direct contact between the heat plate and the patch, as this can cause damage. If your hat has a plastic brim, use a pressing pillow underneath to prevent deformation while protecting it from overheating. Always test heat settings on a scrap piece first to find the right balance. Using these protective materials guarantees your patch adheres properly without ruining your hat’s structure or appearance. Taking these precautions saves you from costly mistakes.
Applying Pressure Correctly
Applying the right amount of pressure is essential when heat pressing patches on hats. Too little pressure and the patch won’t adhere properly; too much can damage the fabric or patch. You want to guarantee even contact between the patch and hat surface throughout the pressing process. Here’s how to apply pressure correctly:
- Use a heat press with adjustable pressure settings.
- Start with medium pressure and adjust based on fabric thickness.
- Ensure the hat is positioned securely to avoid shifting.
- Apply firm, even pressure across the entire patch surface.
- Avoid excessive force that can stretch or deform the hat.
Cooling and Setting the Patch
Once you’ve applied the right pressure and heat, you’ll want to let the patch cool properly to guarantee it sets firmly on the hat. Avoid peeling off the backing or moving the hat while it’s still hot, as this can cause the patch to lift or shift. Let the hat rest on a flat surface for at least 5 to 10 minutes to allow the adhesive to fully bond. Cooling helps the adhesive cure and solidify, ensuring long-lasting adhesion. If you’re in a hurry, you can carefully use a fan to speed up the cooling, but avoid touching the patch until it feels cool to the touch. Proper cooling is key to keeping your patch securely attached and looking sharp.
Tips for Maintaining Your Heat Pressed Hat
To keep your heat pressed hat looking fresh, you’ll want to follow the right cleaning techniques and store it properly. Handling it with care will also help maintain the patch’s adhesion and appearance. Let’s explore simple steps to guarantee your hat stays in great shape.
Cleaning Techniques
Keeping your heat pressed hat clean is essential to preserve both the fabric and the patch’s adhesion. You’ll want to be gentle during cleaning to avoid loosening the patch or damaging the hat.
Here are some effective cleaning techniques:
- Spot clean with a damp cloth and mild detergent to avoid soaking the patch.
- Avoid machine washing or drying, which can weaken the adhesive.
- Use a soft brush to remove dust and dirt without scratching the patch.
- Let your hat air dry naturally, away from direct heat or sunlight.
- If necessary, hand wash gently in cold water, focusing on the fabric and steering clear of the patch.
Storage Recommendations
Proper storage plays a big role in maintaining your heat pressed hat after you’ve cleaned it carefully. To keep the patch intact and the hat’s shape, store it in a cool, dry place away from direct sunlight. Avoid stacking heavy items on top, as this can warp the hat or damage the patch’s adhesion. Use a hat rack or a dedicated shelf where the hat can retain its form without pressure. If you need to store it in a box, choose one spacious enough to prevent crushing. Also, consider placing acid-free tissue paper inside the hat to help maintain its shape and absorb moisture. Following these storage tips will prolong the life of your heat pressed hat and keep it looking sharp.
Handling Best Practices
Handling your heat pressed hat with care is key to preserving both the patch and the hat’s shape. To keep your hat looking sharp and the patch firmly attached, follow these handling best practices. First, avoid bending or crushing the hat, especially near the patch area. Second, keep it away from prolonged moisture to prevent weakening the adhesive. Third, when cleaning, spot clean gently rather than machine washing. Fourth, store your hat on a flat surface or a hat rack to maintain its form. Ultimately, avoid excessive heat exposure after pressing, as it can cause the patch to peel or warp.
- Don’t bend the brim or crown near the patch
- Keep the hat dry and avoid soaking
- Spot clean with mild detergent only
- Store on a flat surface or structured stand
- Avoid leaving the hat in hot cars or direct sun for long periods
Frequently Asked Questions
Can I Heat Press Patches on Hats Made of Leather?
You can heat press patches on leather hats, but you need to be cautious. Use a low temperature and a protective cloth to avoid damage. Test a small area first to guarantee the leather won’t warp or burn.
How Do I Remove a Heat Pressed Patch Without Damaging the Hat?
Like peeling a sticker gently, you’ll want to warm the patch with a heat press or iron, then slowly lift it using a thin, flat tool. Don’t rush; this helps avoid damaging your hat’s fabric.
Are There Specific Types of Patches to Avoid for Heat Pressing?
You should avoid patches with plastic backing or delicate embroidery, as they might melt or get damaged during heat pressing. Also, patches with adhesive that isn’t heat-activated won’t stick properly, so check the material first.
Can I Reuse a Heat Pressed Patch on a Different Hat?
You can’t really reuse a heat-pressed patch on a different hat because the adhesive weakens after the first application. Trying to remove it usually damages the patch, so it’s best to use a new patch for each hat.
What Are the Common Mistakes to Avoid When Heat Pressing Patches?
Don’t rush like a bull in a china shop—you’ll want to avoid incorrect temperature, pressing too long or too short, not using a protective sheet, and misaligning patches. These slip-ups can ruin your design’s crispness and durability.
Conclusion
Now that you know how to heat press patches on hats, you’re ready to make your gear pop like fireworks on the Fourth of July. Just remember, choosing the right materials and applying steady pressure are key to a lasting bond. Take your time with positioning and cooling, and your custom hat will stay sharp for miles. With a little care, your personalized style will stick around longer than a catchy tune!