
How to Use Cricut Heat Press? Definitive Guide
To use a Cricut Heat Press, gather your essential tools: the press itself, a heat-resistant mat, and your chosen design materials like HTV or infusible ink. First, create and size your design in Cricut Design Space, remembering to mirror the image for iron-on transfers.
Place your heat press on a sturdy surface and set the temperature and time according to the material’s needs. Position and secure your design on the fabric with heat-resistant tape. Cover with a protective sheet and press evenly.
Once cooled, peel the backing to reveal your masterpiece. Discover more effective tips and project ideas next.
What is a Cricut Heat Press?
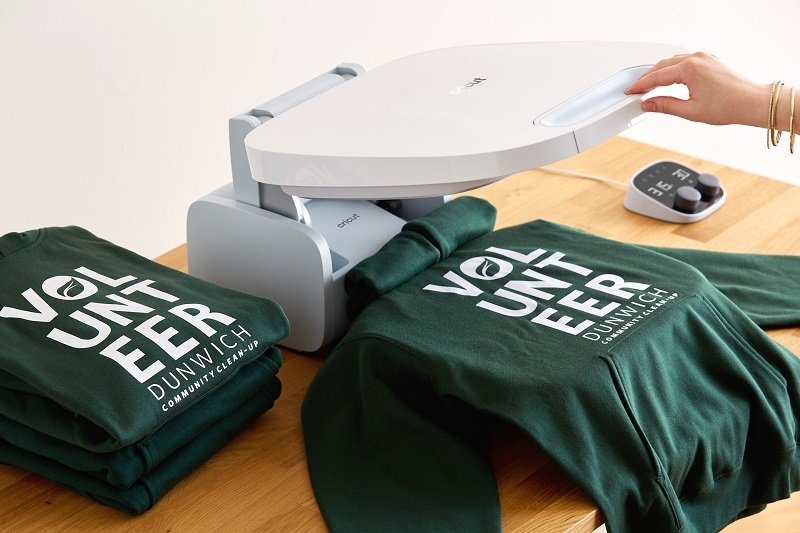
A Cricut Heat Press is a versatile tool that lets you easily transfer designs onto various materials, such as fabric and wood. You’ll find it perfect for crafting customized apparel, home décor, or personalized gifts. Unlike traditional irons, a heat press provides consistent heat and pressure, ensuring your designs adhere properly without wrinkles or fading.
You can adjust the temperature and timer settings to suit your specific project needs. This flexibility makes it suitable for a variety of transfer types, including vinyl, sublimation, and more. Whether you’re a beginner or an experienced crafter, the intuitive design makes it user-friendly and efficient.
With the Cricut Heat Press, you’ll achieve professional-quality results at home, elevating your crafting projects to the next level.
Tools and Materials You’ll Need
To get started with your Cricut Heat Press project, you’ll need a few essential tools and materials to ensure success. First, have your Cricut Heat Press machine ready along with a heat-resistant mat or surface.
You’ll also need a Cricut cutting machine to create your design, as well as compatible heat transfer vinyl (HTV) or infusible ink sheets. Don’t forget a weeding tool to remove any excess vinyl after cutting your design.
You’ll also need a lint roller to clean your fabric surface, ensuring it’s free from dust or debris. Keep a pressing cloth or parchment paper handy to protect your design during the pressing process. Finally, have your chosen fabric item, like a t-shirt or tote bag, prepped and ready for personalization.
Preparing Your Design

Start by selecting or creating a design in the Cricut Design Space software that suits your project. You can explore pre-made designs or customize your own to match your vision. Once you’ve chosen your design, ensure it’s properly sized for your material. Pay attention to dimensions, as they play a crucial role in the final outcome.
Next, mirror the design if you’re working with iron-on materials. This step is vital as it ensures the design appears correctly once transferred onto your surface. Double-check that all design elements are appropriately aligned and grouped to maintain consistency during cutting.
Setting Up Your Cricut Heat Press
With your design ready, it’s time to set up your Cricut Heat Press to ensure perfect application. First, find a sturdy, heat-resistant surface to place your press on. Plug it in, and turn it on using the power button. Select the appropriate temperature and timer settings based on your material and design requirements. You can find recommended settings in the Cricut Heat Guide.
Next, allow the heat press to warm up until the indicator light signals it’s ready. While waiting, prepare your workspace by laying out your material and design. Ensure there’s enough room to maneuver the press comfortably.
If your press comes with a pressing mat, place it underneath your material for added stability and protection. Now, you’re ready for the next step!
Applying the Design
Position your design on the material, ensuring it’s aligned precisely where you want it to be transferred. Use heat-resistant tape to secure it in place, preventing any shifting during the pressing process. Double-check the placement to ensure everything’s just right. Once you’re satisfied, preheat your Cricut Heat Press to the recommended temperature for your material type.
Place a protective sheet, like parchment paper or a Teflon sheet, over your design to safeguard it and the heat plate from direct contact. Carefully lower the heat press onto the material, applying even pressure. Set the timer according to the design’s instructions.
Once the time is up, lift the press carefully. Allow the design to cool slightly before removing the protective sheet. Enjoy your perfectly applied design!
Troubleshooting Common Issues
While working with a Cricut Heat Press, you might encounter issues like uneven transfers or peeling designs. Don’t worry; these problems are common and often easy to fix. Here are some troubleshooting tips:
- Uneven Transfers: Ensure your material is flat and smooth. Wrinkles or creases can lead to uneven results. Use a pressing mat for a stable surface.
- Peeling Designs: This often happens if the heat or pressure wasn’t applied correctly. Double-check the settings on your Cricut Heat Press, and make sure you’re following the recommended guidelines for your specific material.
- Adhesive Residue: If you notice sticky residue on your design, it might be due to excess heat. Lower the temperature slightly and test on a scrap piece first.
Tips for Best Results
To achieve the best results with your Cricut Heat Press, ensure you use the correct temperature and pressure settings tailored for your material. Different fabrics and vinyl require specific conditions, so always check the manufacturer’s guidelines. Preheat your material by pressing it for a few seconds before applying the design. This step helps remove moisture and wrinkles, ensuring a smooth transfer.
Use a Teflon sheet or parchment paper between the heat plate and your design to prevent sticking and protect your project. Make sure your surface is flat and sturdy for even pressure distribution. After pressing, let your design cool down before peeling to avoid lifting. Practicing on scrap materials first can help you perfect your technique and achieve professional-looking results.
Project Ideas to Try
With a Cricut Heat Press, you can create a variety of exciting projects that are both fun and functional. Consider starting with personalized T-shirts or custom tote bags to showcase your unique style. You can also craft decorative pillows or design mugs and tumblers to add a personal touch to your home and kitchen essentials.
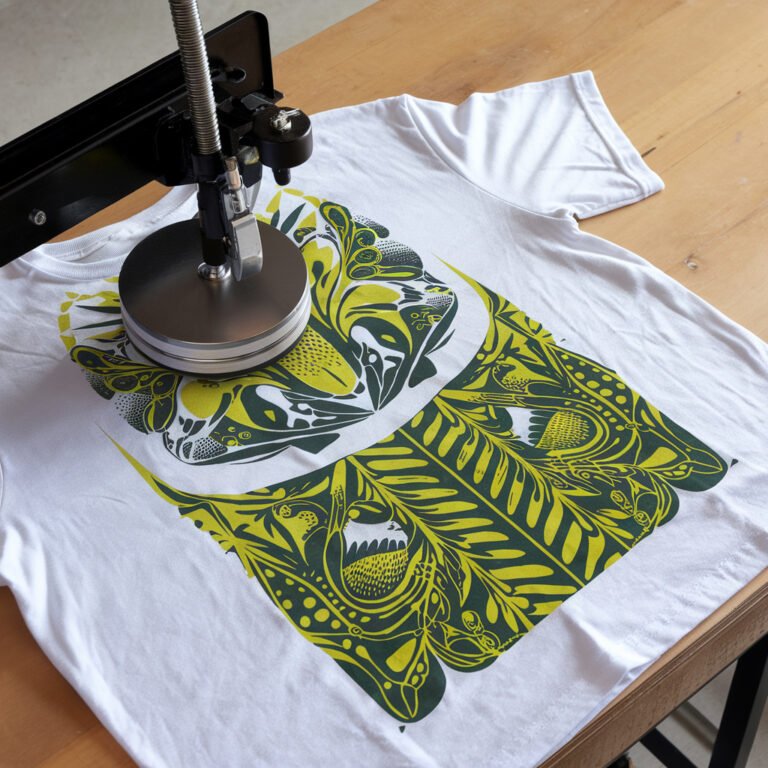
Personalized T-shirts
Crafting personalized T-shirts with a Cricut heat press lets you express your creativity and make unique wardrobe pieces. You can design shirts for yourself, gifts, or even special events. Here are some project ideas to consider:
- Family Reunion Shirts: Create matching tees for family gatherings. Use family names, a memorable quote, or a fun family logo to make the event extra special.
- Team Spirit Wear: Support your favorite sports team by designing custom shirts with team colors and logos. It’s a great way to show your enthusiasm and rally fellow fans.
- Motivational Quotes: Inspire yourself and others with T-shirts featuring uplifting or witty quotes. Choose fonts and colors that reflect your personality and message.
These ideas are just the beginning of your T-shirt design journey!
Custom tote bags
Creating custom tote bags with a Cricut heat press is a fun way to add personal flair to your everyday accessories. First, select a plain tote bag in your preferred color. Use Cricut Design Space to choose or create a unique design. Make sure to mirror your design before cutting it on heat transfer vinyl.
Once cut, weed out any excess vinyl, leaving only your design. Preheat your tote bag with the Cricut heat press for a few seconds to remove moisture. Position your design on the bag, cover it with a protective sheet, and apply the heat press for the recommended time and temperature.
Let it cool slightly, then peel away the backing. Enjoy your one-of-a-kind tote bag!
Decorative pillows
Transform plain cushions into eye-catching decorative pillows by using a Cricut heat press to apply your favorite designs. Whether you’re sprucing up your living room or adding a personal touch to your bedroom, decorative pillows are a fantastic way to express your style. Here’s how you can get started:
- Choose Your Design: Pick a design that matches your room’s theme. You can use pre-made designs or create your own in Cricut Design Space.
- Select Your Material: Opt for heat transfer vinyl (HTV) that works well with fabrics and ensures durability.
- Press and Peel: Use the Cricut heat press to apply your design. Follow the recommended settings for your fabric, then peel the backing off once cooled.
Get creative and watch your space transform!
Mugs and tumblers
Personalize your mugs and tumblers with a Cricut heat press to make every sip a stylish experience. Imagine sipping your morning coffee from a mug adorned with your favorite quote or gifting a personalized tumbler that sparks joy.
The Cricut heat press makes it easy to transfer intricate designs onto ceramic and stainless steel, offering endless customization possibilities. Use vibrant colors or metallic finishes to create unique pieces that stand out.
Here’s how such projects can make you feel:
| Feeling | Description |
|---|---|
| Joy | Seeing your creativity come alive. |
| Pride | Crafting something truly unique. |
| Connection | Giving personalized gifts. |
| Comfort | Enjoying your customized drinkware. |
| Inspiration | Sparking new creative ideas. |
Dive in, and let your creativity flow!
Frequently Asked Questions
How Do I Clean My Cricut Heat Press After Use?
After using your Cricut heat press, cleaning it’s pretty straightforward. First, unplug it and let it cool completely. Use a damp cloth with mild soap to wipe the heat plate gently. Don’t use abrasive cleaners or scrubbers, as they can damage the surface. For any stubborn residues, a bit of rubbing alcohol on a cloth should do the trick. Keep it clean to ensure smooth projects every time!
Can I Use Non-Cricut Materials With My Heat Press?
You can use non-Cricut materials with your heat press, but you’ll need to be careful. Always check the material’s heat tolerance and press settings to avoid damage. Do a test run on a small piece if possible. It’s also important to ensure the material is compatible with the adhesive properties of your design.
Remember, using third-party materials might void any warranty, so weigh the pros and cons before proceeding.
Is It Safe to Use on Delicate Fabrics?
When you’re using a heat press on delicate fabrics, safety is key. Yes, it can be safe, but you’ve got to be cautious. Start with a lower temperature setting and always use a pressing cloth to protect the fabric. Test a small, inconspicuous area first to ensure there’s no damage.
Delicate materials require a gentle touch, so don’t rush the process. With a little care, you’ll get great results!
How Do I Store My Cricut Heat Press?
When storing your Cricut Heat Press, make sure it’s completely cooled down. Keep it in a dry, safe spot where it won’t get knocked over. Use the protective base it came with and ensure the power cord isn’t tangled or stressed.
If possible, store it in its original box to protect it from dust and damage. Organizing your pressing materials nearby can make your next project easier too!
Can I Use the Heat Press on Wood or Ceramic Surfaces?
Yes, you can use your heat press on wood or ceramic surfaces! Just make sure you’ve got the right materials and settings. For wood, use a thin protective sheet to prevent scorching. With ceramics, ensure your design is heat-transfer vinyl compatible.
Preheat the surfaces slightly for better adhesion, and always check the temperature and time settings for each project. Take care, and you’ll craft some amazing personalized items!
Conclusion
In no time, you’ll master using your Cricut Heat Press to create stunning, personalized projects. Remember to gather all the necessary tools, carefully prepare your design, and follow the setup instructions. If any issues arise, don’t fret—troubleshooting is part of the learning process.
With practice, you’ll achieve professional-looking results. Experiment with various materials and designs to unleash your creativity. Now, it’s up to you to bring your ideas to life and enjoy the satisfaction of crafting!
Good wway of describing, and pleasant paragraph to obtain information about my presentation focus, which i am goin to present in academy.